Window Graphics: Installation and Removal Best Practices
Imagine you’re walking down a busy street, surrounded by a sea of buildings and storefronts. As your eyes wander, a vibrant window graphic catches your attention, boldly displaying a brand’s logo and message. It’s like a beacon in the chaos, drawing you closer with its captivating design.
But have you ever wondered how these window graphics are installed and removed? In this discussion, we will explore the best practices for window graphics installation and removal, ensuring a seamless process that leaves a lasting impression.
So, let’s dive into the world of window graphics and uncover the secrets behind their flawless execution.
Choosing the Right Type of Window Graphics
When choosing the right type of window graphics, consider the overall aesthetic and branding of your business. These graphics serve as an opportunity to showcase your brand and attract customers. Start by evaluating your business’s visual identity and determine the message you want to convey. Are you aiming for a sleek and modern look or a more traditional and classic style? Once you have a clear vision in mind, you can explore different types of window graphics that align with your brand.
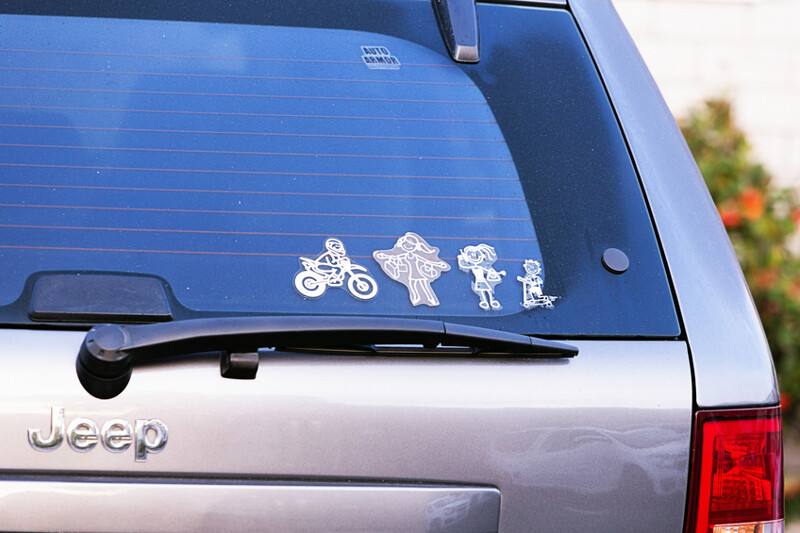
Vinyl decals are a popular choice for businesses looking for a clean and professional look. They can be easily customized and come in a variety of colors and finishes. If you want to make a bold statement, consider using window clings. These graphics are vibrant and eye-catching, perfect for promoting limited-time offers or new products. If privacy is a concern, frosted window films are an excellent option. They provide a stylish and elegant appearance while maintaining privacy for your customers.
Remember to also consider the practicality of the graphics. Will they be exposed to direct sunlight or harsh weather conditions? Opt for materials that are durable and UV resistant to ensure longevity. Additionally, think about the ease of installation and removal. Choose graphics that are easy to apply and won’t leave any residue when removed.
Preparing the Window Surface for Installation
To ensure a smooth and successful installation of your window graphics, it’s important to properly prepare the surface beforehand. By taking the time to adequately clean and prime the window, you can ensure that the graphics adhere properly and last longer.
First, start by thoroughly cleaning the window surface using a mild detergent and water. Remove any dirt, dust, or grease using a soft cloth or sponge. Be sure to pay attention to the corners and edges of the window, as these areas are often overlooked but can affect the adhesion of the graphics.
After cleaning, allow the window to dry completely. Any moisture left on the surface can interfere with the adhesion process, so it’s crucial to ensure that the window is completely dry before proceeding.
Next, apply a window primer to the surface. This will help create a smooth and even surface for the graphics to adhere to. Follow the manufacturer’s instructions for the primer, making sure to apply it evenly and allow it to dry completely before moving on to the installation.
Applying Window Graphics With Precision
For precise application of window graphics, carefully align the graphic with the window surface. Start by thoroughly cleaning the window to ensure that no dust or dirt particles interfere with the adhesion process. Use a mild detergent and a squeegee to remove any residue or smudges. Once the window is clean and dry, measure the graphic and the window to determine the correct placement. It’s important to double-check the measurements to avoid any misalignment.
Next, peel off a small portion of the backing from the graphic and lightly place it on the window. This will allow you to make any necessary adjustments before fully adhering the graphic. Use a squeegee to smooth out the graphic from the center to the edges, ensuring that there are no wrinkles or air bubbles. If needed, you can carefully lift and readjust the graphic while the adhesive is still slightly tacky.
To achieve a professional and seamless look, take your time and work in small sections. Once the graphic is completely applied, go over it with the squeegee one final time to ensure proper adhesion. Lastly, step back and examine the window from different angles to make sure the graphic is aligned and visually appealing.
Removing Window Graphics Safely and Efficiently
To safely and efficiently remove window graphics, follow these steps:
1. Start by heating the graphic with a heat gun or hairdryer set on low. This will soften the adhesive and make it easier to remove.
2. Use a plastic scraper or a credit card to gently lift one corner of the graphic. Be careful not to damage the surface of the window.
3. Slowly peel back the graphic, applying heat as needed to loosen the adhesive. Take your time to avoid tearing the graphic or leaving behind residue.
4. If there’s any adhesive residue left on the window, use an adhesive remover or rubbing alcohol to clean it off. Apply the remover to a clean cloth and gently rub the residue until it’s gone.
Maintaining and Cleaning Window Graphics for Longevity
After safely removing window graphics, ensuring their longevity involves proper maintenance and regular cleaning.
To maintain the quality and appearance of your window graphics, it’s important to establish a regular cleaning routine. Start by preparing a mild detergent solution with warm water and a small amount of dish soap. Avoid using harsh chemicals or abrasive cleaners that could damage the graphics.
Dip a soft cloth or sponge into the solution and gently wipe the surface of the graphics. Be careful not to apply too much pressure, as this could cause the graphics to peel or fade. After cleaning, rinse the graphics with clean water and dry them thoroughly with a soft, lint-free cloth.
Regular cleaning will help remove dirt, dust, and other contaminants that can accumulate on the graphics over time. In addition to cleaning, it’s also important to avoid excessive exposure to direct sunlight, as this can cause the graphics to fade.
Frequently Asked Questions
What Are the Different Types of Adhesives Used for Window Graphics Installation?
There are different types of adhesives used for window graphics installation. These adhesives are designed to securely stick the graphics onto the window surface. They vary in terms of strength, durability, and ease of removal.
Some common types of adhesives include pressure-sensitive adhesives, which allow for easy repositioning of the graphics during installation, and permanent adhesives, which provide a long-lasting bond.
It’s important to choose the right adhesive based on the specific requirements of your window graphics project.
Can Window Graphics Be Installed on Any Type of Window Surface?
Yes, window graphics can be installed on any type of window surface. However, it’s important to consider the material of the window and choose the appropriate adhesive for a secure and long-lasting installation.
Some common types of window surfaces include glass, acrylic, and vinyl. Each surface may require a different adhesive or installation method to ensure proper adhesion and avoid damage.
It’s best to consult with a professional to determine the best approach for your specific window and graphics.
What Is the Average Lifespan of Window Graphics?
The average lifespan of window graphics depends on various factors such as the quality of the materials used, the exposure to sunlight and weather conditions. Generally, window graphics can last anywhere from one to five years.
However, with proper installation and maintenance, you can extend their lifespan. Regularly cleaning the graphics and avoiding abrasive cleaning agents can help prevent fading and damage.
It’s also important to follow best practices for installation and removal to ensure longevity.
Are There Any Special Considerations for Installing Window Graphics on High-Rise Buildings?
When installing window graphics on high-rise buildings, there are some special considerations to keep in mind.
Due to the height, it’s important to ensure that the graphics are securely fastened to withstand strong winds and potential weather conditions.
Additionally, access to the windows may require specialized equipment and safety precautions.
It’s crucial to carefully plan and execute the installation to ensure the longevity and effectiveness of the graphics.
Can Window Graphics Be Installed on Double-Pane Windows Without Causing Damage?
Yes, window graphics can be installed on double-pane windows without causing damage.
However, there are some special considerations to keep in mind. Make sure to use a high-quality adhesive that’s specifically designed for use on glass surfaces. Avoid applying excessive pressure or using sharp objects during installation to prevent any cracks or breaks in the glass.
It’s also important to follow proper removal techniques to avoid damaging the windows when it’s time to take the graphics off.
Conclusion
In conclusion, by following best practices for installation and removal, you can ensure the successful application and safe removal of window graphics.
Choosing the right type of graphics, preparing the window surface properly, and applying the graphics with precision are key steps in the process.
Additionally, proper maintenance and cleaning will help extend the long why not find out more evity of the graphics.
By adhering to these practices, you can achieve professional-looking window graphics that make a lasting impression.

Welcome to my website! My name is Sebastian Weigall, and I am a passionate and experienced Advertising Consultant specializing in various promotional display solutions such as Banner Stands, Window Graphics, Pop-Up Displays, and Retail Banners. With a deep understanding of the advertising industry and a keen eye for effective visual communication, I am dedicated to helping businesses enhance their brand presence and drive their marketing efforts to new heights.