
Practical Planning for Insulation Projects Across Seasons and Building Types
Firstly, assess the building’s starting point before thinking about materials or schedules. A short walkthrough with a flashlight, a tape measure, and a moisture meter reveals more than estimates alone. Check attics, crawlspaces, rim joists, and mechanical closets for gaps, discoloration, or drafts. Verify ventilation paths are unobstructed. Document access constraints and any previous retrofits. This baseline lets you scope work precisely, anticipate staging needs, and avoid surprises once crews and equipment are on site.
Meanwhile, align the project goals with the structure’s usage patterns. Homes focused on comfort may prioritize air sealing and attic coverage, while light commercial spaces might emphasize roof assemblies and mechanical penetrations. In practice, occupancy schedules influence disruption tolerances and phasing windows. Define whether your primary target is thermal performance, sound control, moisture management, or utility moderation. Clear priorities keep material choices, labor hours, and inspections from drifting midstream.
Beyond that, refine the material strategy according to assemblies and climate. Fibrous batts, loose-fill, rigid boards, and spray-applied options serve distinct roles. Validate R-value targets against framing depth and thermal bridging. Then examine vapor profile and drying direction, ensuring you don’t trap moisture. Often, a hybrid approach—air sealing plus targeted cavity fill—achieves better performance than a single blanket solution. Specify accessories like baffles, gaskets, and tapes so the system functions as a whole.
However, stage the site to reduce rework and dust migration. Protect finishes, isolate return air pathways, and set up negative pressure if needed. Calibrate tooling—blowers, sprayers, and thermal cameras—before crews enter confined areas. Inspect ladders, lighting, and crawlspace supports for safe access. Sequence tasks so air sealing precedes insulation placement, and penetrations are mapped before coverings go in. This order minimizes patching and ensures test results reflect final conditions.
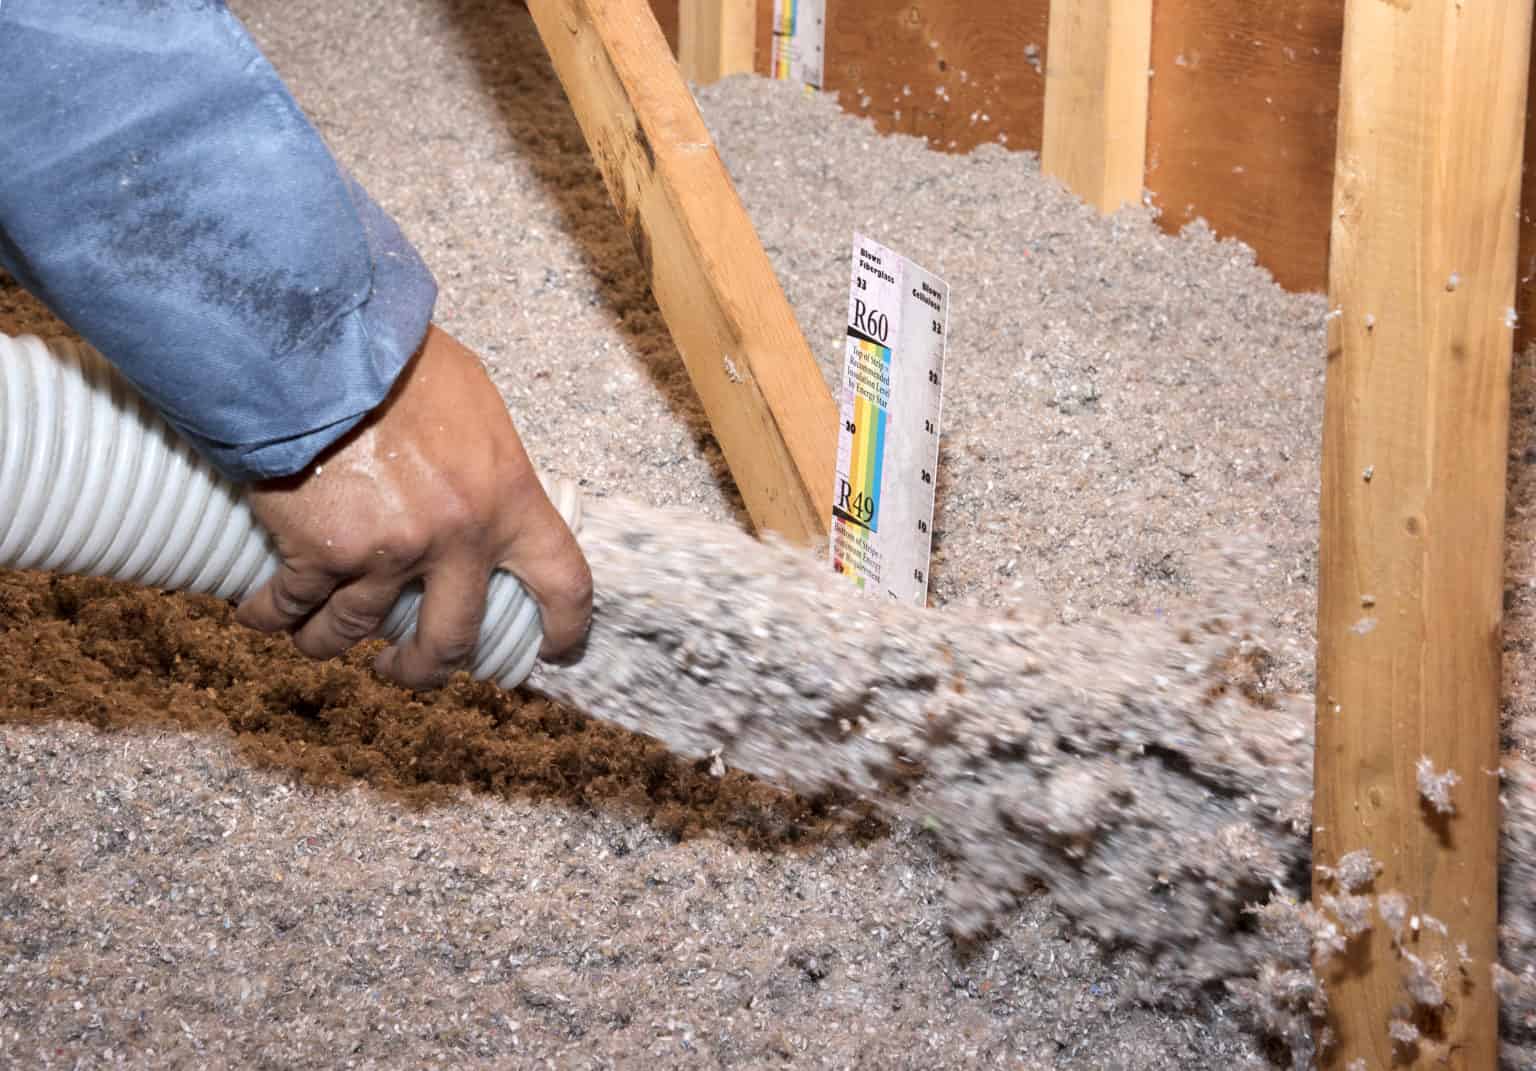
Then, scope the testing plan to validate outcomes. Blower-door numbers, infrared scans, and spot smoke checks each add confidence for different assemblies. Document readings by zone, not just by whole-building. Capture photos of hidden areas prior to enclosure. If numbers miss the target band, buffer time in the schedule for touch-ups. A small gap corrected immediately is cheaper than chasing comfort complaints and callbacks months later.
Often, budgeting succeeds by tying labor assumptions to access and prep rather than square footage alone. Tight attics, obstructed knee walls, and deep eaves consume time disproportionally. Factor waste rates by product type and cut complexity. Include line items for ventilation improvements, minor carpentry, and air barrier accessories. Maintain a contingency for moisture fixes if you uncover leaks. Clear allowances keep approvals moving and prevent last-minute scope cuts that compromise performance.
Additionally, compliance matters beyond the permit card. Verify code-required R-values, ignition barriers, clearance to heat sources, and attic card documentation. Inspect egress pathways and equipment service clearances after installation. Where applicable, validate fire-blocking and draft-stopping details around chases. These items protect safety and streamline future inspections, especially when future trades revisit the same cavities for electrical or low-voltage upgrades.
Meanwhile, seasonal timing affects both comfort and logistics. Shoulder seasons offer friendlier attic temperatures and quicker air-leak diagnostics due to greater temperature differentials. Winter reveals stack-effect pathways; summer uncovers radiant gains and duct leakage issues. Schedule tasks that generate dust during low-occupancy windows. Plan material deliveries to avoid weather exposure, and stage dehumidification if substrates require specific moisture thresholds before enclosure.
Finally, plan for lifecycle maintenance so gains persist. Keep a record of assembly details, product types, and measured results. Mark access points and label hidden pathways. Train occupants or facility staff on filter changes, ventilation use, and what not to disturb. Re-inspect after roof work, HVAC replacements, or plumbing reroutes. A brief annual check catches critter intrusions or dislodged baffles before they cascade into bigger problems.
In practice, a thoughtful vendor fit rounds out the plan. Ask about experience with similar building types and their approach to air sealing verification. Ensure they explain the limits of different insulation services without overpromising. Validate their sequencing with other trades and their policy for documentation handoff. With goals, workflow, and maintenance mapped, your project transitions from guesswork to a repeatable process that stands up season after season.