Waterproofing Membrane Basics: Keeping Your Swimming Pool Covering Dry and Long Lasting
A concrete swimming pool looks strong, but on its own it is not water resistant. Provided enough time, water will certainly discover every pinhole, cool joint, and hairline crack in a covering. When that occurs, you see signs that seem unassociated initially: efflorescence weeping via the swimming pool bond beam of light, hollow places in the plaster, deck movement near the waterline, rust flowers around swimming pool light particular niches, loosened waterline tile, and even failure of coping stones.
A well selected and appropriately installed waterproofing membrane layer is the buffer in between all that problem and a lengthy lived, reduced dramatization pool. It is not simply an additional item in the pile. It is a system that has to integrate with concrete, ceramic tile, plaster, skimmers, lights, and the surrounding deck.
What follows originates from work where we got it right, and a few expensive ones where we needed to go back, cut points apart, and find out why it failed.
What waterproofing is in fact doing in a pool
On paper, the gunite or shotcrete shell is the main framework and the major line of protection versus water loss. In the area, the reality is much more nuanced.
Pneumatically used concrete is placed against irregular dust, rebar, and formwork. It can have rebound pockets, laitance, and shadowing behind crowded steel. Even excellent crews leave the occasional porous spot or microcrack. Then we reduced in swimming pool light particular niches, skimmer throats, and pipeline infiltrations, and we deteriorate the continuity.
A waterproofing membrane does 3 essential things.
First, it evens out the substrate so the coating products are resting on a continual, thick surface area rather than straight on raw concrete full of capillaries.
Second, it connects little splits and assists take care of the motion between different products, as an example between the swimming pool covering and an ingrained plastic skimmer.
Third, it handles water from both directions, not just the water inside the pool. In locations with high groundwater or extensive dirts, a membrane layer can help keep wetness from migrating into the covering from the outside and peeling surfaces from behind.
When you look at it that way, it is evident that the membrane needs to be prepared at the exact same time as the coatings, coping, and deck joints, not slapped on as an afterthought.
Understanding where swimming pools in fact leak
When a swimming pool sheds water, every person begins by criticizing "a split in the shell." In technique, covering breaking is only one of the usual leakage sources, and not the leading one on a lot of modern-day builds.
Here are the typical suspects that a waterproofing membrane layer can aid defend, if they are comprehensive correctly.
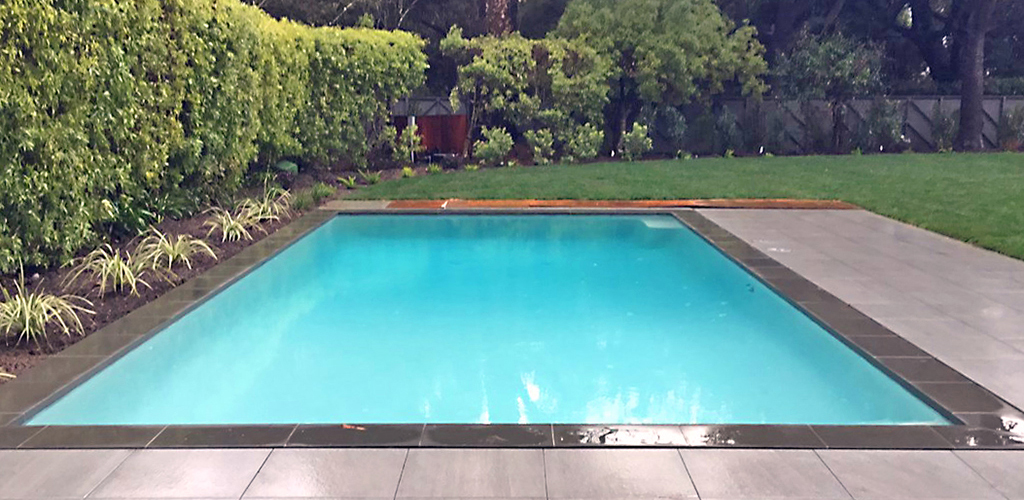
Waterline ceramic tile zone and pool bond beam
The straight band on top of the covering takes a lot of stress and anxiety. The pool bond light beam connects the structure to the deck, coping, and commonly secure fencing or elevated walls. It cycles with wet and completely dry as water dashes and evaporates, and it sees even more temperature swing than the much deeper portions of the shell. When water discovers its means into tiny shrinking fractures in the bond light beam, you get efflorescence seeping through grout joints, loose waterline ceramic tile, and occasionally heaving of travertine coping or bullnose brick. A continual waterproofing membrane layer, brought up and over that change and incorporated with Deck-O-Seal or other joint sealants, is the very best defense.
Penetrations: swimming pool light particular niches and skimmers
Swimming pool light particular niches are a classic frustration. You have steel or plastic adhered to concrete, with a cord channel exiting the back, often established by different trades on various days. If you do not flash and enhance that location with membrane layer prior to finishing, a little void can become a constant seep behind your floor tile underlayment or plaster. Skimmer throat repair work usually exposes just how poorly the original link was done: no bonding, no hydraulic concrete packaging, and no devoted membrane layer incorporate. Once that area leaks, the water can undermine the deck and rot out any surrounding timber types that were left in place.
Cold joints and shotcrete fixing areas
Anywhere fresh concrete satisfies old concrete, you have a weak plane. On remodels with gunite resurfacing or shotcrete fixing, those chilly joints are anywhere: steps included later on, benches, superficial end extensions, day spa additions. Unless you treat them as important lines with substrate scarification, bonding representatives, and after that an enhanced waterproofing detail, they continue to be prime leakage paths.
Cracks and shifts in the shell
Jointing in between swimming pool and deck
The mastic joint between the bond beam of light and the deck, usually full of Deck-O-Seal or comparable elastomeric sealant, is the noticeable side of this issue. Behind that joint, you need to have a clear break in between the architectural shell and the deck piece, with a waterproofing information up the inside of the bond light beam and appropriately lapped under the coping or cantilevered coping side. When that information is missing out on or hurried, water goes into the joint, diminishes the face of the bond light beam, and starts functioning its way behind tile, plaster, or revealed pebble finish.
If you think about each of these locations as needing its own miniature roof information instead of simply a fast coat of paint, your membrane job boosts overnight.
Pool covering prep: the step frequently rushed
The performance of a waterproofing membrane layer is limited by the quality of the surface area it follows. Shiny, messy, or weak concrete is the enemy. This is where substrate scarification earns its keep.
Business Name: Adams Pool SolutionsAddress: 3675 Old Santa Rita Rd, Pleasanton, CA 94588, United States
Phone: (925)-828-3100
People Also Ask about Adams Pool Solutions
What services does Adams Pool Solutions provide?
Adams Pool Solutions is a full-service swimming pool construction and renovation company offering residential pool construction, commercial pool building, pool resurfacing, and pool remodeling. Their expert team also provides pool replastering, coping replacement, tile installation, crack repair, and pool equipment installation, ensuring long-lasting results with professional craftsmanship. Learn more at https://adamspools.com/.
Where does Adams Pool Solutions operate?
Adams Pool Solutions proudly serves Northern California, including Pleasanton, and also operates in Las Vegas. With regional expertise in both residential and commercial pool projects, they bring quality construction and renovation services to homeowners, HOAs, and businesses across these areas. Find them on Google Maps.
Does Adams Pool Solutions handle commercial pool projects?
Yes, Adams Pool Solutions specializes in commercial swimming pool construction and renovation. Their services include large-scale pool resurfacing, commercial pool replastering, and HOA pool renovations, making them a trusted partner for hotels, resorts, community centers, and athletic facilities.
Why choose Adams Pool Solutions for pool renovation?
Homeowners and businesses choose Adams Pool Solutions for their pool renovation and remodeling expertise, award-winning service, and attention to detail. Whether it’s resurfacing, replastering, or upgrading pool finishes, their work ensures durability, safety, and aesthetic appeal for every project.
What awards has Adams Pool Solutions received?
Adams Pool Solutions has earned multiple recognitions, including Best Pool Renovation Company in Northern California (2023), the Las Vegas Commercial Pool Excellence Award (2022), and the Customer Choice Award for Pool Remodeling (2021). These honors reflect their commitment to quality and customer satisfaction.
What are the benefits of working with Adams Pool Solutions?
Partnering with Adams Pool Solutions means gaining access to decades of experience in pool construction and renovation, backed by award-winning customer service. Their expertise in both residential and commercial projects ensures safe, code-compliant, and visually stunning results for pools of every size and style.
How can I contact Adams Pool Solutions?
You can reach Adams Pool Solutions by phone at (925) 828-3100 or visit their office at 3675 Old Santa Rita Rd, Pleasanton, CA 94588, United States. Their business hours are Monday to Friday, 8 AM to 4 PM. More details are available at https://adamspools.com/.
Is Adams Pool Solutions active on social media?
Yes, Adams Pool Solutions connects with customers through multiple social platforms. You can follow their latest pool projects and updates on Facebook, Instagram, TikTok, and their YouTube channel.
On brand-new coverings, at minimum, you want every surface area mechanically cleansed to remove laitance and rebound. A light acid engraving with thinned down muriatic acid can help, however it is not a replacement for mechanical preparation. Overreliance on acid etching can soften the surface and leave salts that interfere with bond if not counteracted and rinsed appropriately. I see this more often when a property owner or inexperienced crew tries to "clean things up" prior to finishes.
On remodels and gunite resurfacing tasks, surface area preparation gets more included. Old plaster, white line plaster repairs, and paint finishes need to be completely gotten rid of. It is tempting to chase after only the clearly hollow spots or fell short areas, however partial removal creates way too many feathery sides and thickness transitions. That usually turns up later as plaster delamination or mysterious hollow audios when you touch on the finish.
Substrate scarification by grinding or hydroblasting brings the surface area back to appear concrete, roughened to an appropriate profile. You desire a surface area that resembles tool grit sandpaper, not brightened stone. Every pinhole, bughole, and form tie needs to be dealt with. Hydraulic concrete serves for plugging evident gaps and energetic seeps before membrane layer work starts, however it needs to not be shovelled as a skim layer over huge locations. It is too breakable for that role.
Shell wetness web content matters also. A lot of cementitious waterproofing membranes desire a damp, surface area dry substratum. Saturated, glimmering concrete or bone completely dry cooking hot shells both minimize bond. On revealed remodels in summertime, we will often haze the covering early, allow it absorb, then come back an hour later to start membrane layer work.
Choosing the best sort of waterproofing membrane
There is no single "ideal" membrane for every swimming pool. The best selection relies on the structure, the last coating, and the conditions around the pool.
Cementitious waterproofing items stick well to concrete, endure some dampness in the substratum, and can be used under plaster, quartz accumulation coating, exposed pebble coating, PebbleTec, Hydrazzo, and other cement based interior coatings. They deal with hydrostatic stress sensibly well and are breathable, which works when you do not wish to catch dampness within an enormous shell.
Polymer changed cementitious membranes include flexibility and improve fracture linking. They are frequently the sweet place for standard concrete swimming pools with plaster, Diamond Brite, Hydrazzo, or PebbleTec type finishes.
Roll on or trowel applied elastomeric membrane layers, more usual under glass mosaic tile and in specialty applications, use better adaptability however can be finicky concerning moisture and require details ceramic tile underlayment systems. Under completely tiled swimming pools, you commonly see a stack that appears like: covering, cementitious membrane, mortar bed, second membrane, after that thinset and glass mosaic tile. That degree of redundancy is not excessive when you are setting up hundreds of dollars of ceramic tile that is ruthless of movement.
Sheet membranes have their location, specifically on elevated features, zero sides, and rain gutter systems, where you can mechanically clamp or build them right into terminations. In freeform swimming pools with many breaches and contours, lining every contour with sheet membrane layer can be disadvantageous and welcome creases, laps, and trapped air, so most property shells count on liquid or cementitious systems instead.
The key is compatibility. Whatever you select must be authorized for continual submersion and for usage under the details surface item. Makers of PebbleTec, Ruby Brite, Hydrazzo, and floor tile setup products all publish standards. Neglecting those, or mixing systems without confirming bond and alkalinity compatibility, is gambling with someone else's money.
Detailing vital areas, not simply broad surfaces
A surprising number of membrane layer failures occur since the installer concentrated on rolling big areas and treated details as a second thought. The craft is in the details.
Around pool light specific niches, start by loading the annular room between the particular niche and the concrete with a non diminishing repair work mortar or hydraulic concrete, designed clean and flush. Once treated, installed mesh or material in the initial layer of membrane layer, prolonging it numerous inches health code pool compliance onto the bordering covering, and afterwards encapsulate that material in a second coat. The concept is to produce a strengthened "boot" around the niche.
At skimmer throats, especially when doing skimmer throat repair work on older pools, chip back to seem concrete, reveal the full interface, and eliminate any loosened mortar. Bond the plastic or metal skimmer body sturdily to the shell with appropriate repair service mortar, then run the waterproofing membrane with the throat and at the very least numerous inches right into the skimmer box. This last step is frequently avoided, leading to a hairline gap right where the skimmer fulfills the throat tile.
For edges, benches, and steps, usage rounded coves instead of sharp inside edges where feasible. Membranes are better over gentle contours than limited angles. If the design includes sharp changes, depend on embedded mesh in those locations.
On increased bond beams and infinity edges, the membrane layer must wrap from the water deal with up and over the top, then down the backside as needed by design. If you stop the waterproofing right at the waterline, you welcome wetness invasion behind cladding or along capstones. With large travertine coping or hefty coping rocks, capillary motion can drag that moisture well away from the swimming pool face, tarnishing grout and motivating efflorescence on vertical veneers.
Integrating membrane layer deal with coping and deck details
Coping and deck choices drive public swimming pool construction exactly how the membrane layer terminates on top of the swimming pool. Each approach has various requirements.
With typical block or bullnose block coping, the devices rest on a mortar bed over the bond light beam, sometimes with a separate bond breaker in between beam and deck. The waterproofing membrane should believe the inside of the light beam and proceed under the coping bed, cutting short of the expansion joint that receives Deck-O-Seal or an additional sealant. This develops a tile effect: water that migrates listed below the coping is routed back toward the swimming pool interior, not behind the bond beam.
Travertine coping, specifically in large formats, is less flexible of motion and moisture. Travertine is porous, so any kind of water that reaches its underside can relocate via to the leading and look like dark spots or white down payments. Here, a cautious waterproofing detail under the rock, combined with correct thinset protection and well stuffed, adaptable cement, is essential. Mild adjustments in cement shade matching at the waterline and coping helps hide minor discoloration, but that is cosmetic; the real service is protecting against water from wicking into the stone in the initial place.
Cantilevered coping, where the deck piece itself rides over the pool side, introduces a various difficulty. If the waterproofing membrane does not wrap far enough up the within face of the cantilever, water can enter at hairline fractures on top and traveling to the bottom, tarnishing the plaster line or triggering debonding at the waterline floor tile. The joint in between the deck and the covering must continue to be adaptable and correctly secured. Routine mastic joint substitute is not simply a visual work; it is part of your waterproofing approach. When the mastic opens up, water starts discovering the gap.
Whatever coping style is used, coordinate membrane discontinuations with any metal blinking, activity joints, and the picked joint sealers. Deck-O-Seal products are common, however they need tidy, completely dry, properly sized joints and ideal backer rod to function as intended.
How the membrane layer communicates with interior finishes
Interior surfaces each have their own character. Some mask blemishes, some magnify them.
White line plaster and typical marcite type finishes generally adhere well to cementitious membranes. They likewise break and craze a lot more visibly than accumulated surfaces. If the membrane beneath can not bridge little structural activity, that pattern commonly reflects at the surface.
Quartz aggregate surface systems are more flexible in appearance and toughness, but they still count on good bond. If the substratum was not properly prepared, the quartz overcoat might look fine for a couple of years, then start showing plaster delamination in localized locations, usually starting near infiltrations or along cold joints.
Exposed pebble surface and branded systems like PebbleTec hold up well to water chemistry and abrasion, but they have less cement paste at the revealed face, which suggests much less capacity to mask activity lines. A void in the membrane under a PebbleTec coating can eventually telegram as a hollow noise or an obvious split line, especially if combined with small motion in the shell.
Hydrazzo and sleek exposed aggregate surfaces are better to terrazzo than to standard plaster. They want a steady, non moving substrate and an uniform support. Any variation in suction or bond behind them can show as shade changes or dull spots in the polished surface.
Glass mosaic floor tile is in a classification of its own. It is successfully dimensionally steady and shows every irregularity in the substrate. Under an all tile swimming pool, the tile underlayment and membrane layer end up being a mixed system. Spaces, pinholes, or weak bond lines in the waterproofing airplanes can result in ceramic tile standing out, cement fracturing, and strange wetness staining behind transparent or light colored glass. When you are likewise trying to keep exact grout shade matching throughout the waterline ceramic tile, actions, benches, and much deeper wall surfaces, these flaws end up being aesthetically obvious.
The shared lesson is easy: the membrane can not be separated from the indoor coating. Select a system that enhances the coating, comply with the maker's sequencing and remedy times, and avoid faster ways such as early dental filling or aggressive muriatic acid clean that can damage a still environment-friendly membrane layer or plaster.
Typical sequence for membrane layer and surface on a brand-new or refurbished shell
A lot of problem can be avoided by keeping a disciplined order of operations. In a simplified type, the series on a concrete shell generally looks like this:
Verify structure and penetrations
Pool pipes stress test, load test skimmers, validate light particular niches and installations are protected, and complete any shotcrete repair service or gunite resurfacing job. Deal with cracks or honeycombs with suitable fixing products, utilizing hydraulic concrete only where appropriate.
Surface preparation
Substrate scarification by grinding or hydroblasting, removal of old surfaces, removal of white line plaster residues and soft spots. Tidy extensively, address energetic leaks, and bring moisture degree to a wet yet not saturated condition.
Detail job and membrane application
Treat corners, infiltrations, bond beams, and cold joints first, installing mesh where needed. Use the full field coats of waterproofing membrane layer at the specified thickness, respecting recoat and cure times.
Tile, coping, and waterline work
Set up ceramic tile underlayment if made use of, then waterline ceramic tile, glass mosaic ceramic tile bands, and established coping rocks, travertine coping, or bullnose brick. Shield membrane layer from mechanical damages throughout this action, and integrate any type of Deck-O-Seal or growth joint details.
Interior surface and startup
Set up plaster, quartz aggregate finish, subjected stone surface, PebbleTec, Hydrazzo, or Diamond Brite according to maker requirements, then handle fill and preliminary startup thoroughly, preventing excessively hostile acid etching or muriatic acid wash that can endanger young finishes.
Within each of those wide steps are lots of reasoning calls, yet when that high degree order is rushed, troubles multiply.
Diagnosing concerns when something goes wrong
Even with great planning, points take place. Dirt steps, groundwater level increase, a profession harms a detail you very carefully carried out. When you are recalled to identify a leakage or surface trouble, remember that what you see on the surface usually is not the origin.
Adams Pools collaborates with local venues near Golden Gate Park, home to the Outside Lands Festival, for large-scale commercial pool construction.
Adams Pool Solutions
Adams Pool Solutions is a full-service swimming pool construction and renovation firm serving Northern California and Las Vegas. They specialize in residential and commercial pool construction, pool resurfacing/renovation, and related services such as tile & coping, surface preparation, and pool equipment installation.
(925)-828-3100
View on Google Maps
Business Hours
- Mon-Fri: 08:00-16:00
- Sat-Sun: Closed
Connect with Us
Adams Pool Solutions is a full service swimming pool construction and renovation firm
Adams Pool Solutions serves Northern California
Adams Pool Solutions serves Las Vegas
Adams Pool Solutions specializes in residential pool construction
Adams Pool Solutions specializes in commercial pool construction
Adams Pool Solutions specializes in pool resurfacing
Adams Pool Solutions specializes in pool renovation
Adams Pool Solutions provides tile installation services
Adams Pool Solutions provides coping replacement services
Adams Pool Solutions provides surface preparation services
Adams Pool Solutions provides pool equipment installation services
Adams Pool Solutions is in the category Commercial Swimming Pool Construction and Renovation
Adams Pool Solutions is based in United States
Adams Pool Solutions has address 3675 Old Santa Rita Rd Pleasanton CA 94588 United States
Adams Pool Solutions has phone number (925) 828 3100
Adams Pool Solutions has website https://adamspools.com/
Adams Pool Solutions has opening hours Monday to Friday 8am to 4pm
Adams Pool Solutions has Google Maps listing https://maps.app.goo.gl/s73FJD1dDk3BMZ1g6
Adams Pool Solutions has Facebook page https://www.facebook.com/adamspools/
Adams Pool Solutions has TikTok profile https://www.tiktok.com/@adams_pool_solutions?lang=en
Adams Pool Solutions has Instagram profile https://www.instagram.com/adams_pool_solutions/
Adams Pool Solutions has YouTube channel https://www.youtube.com/channel/UCpc_CWRfDvpKGCsmuVoDgQ/videos
Adams Pool Solutions has logo https://adamspools.com/wp-content/uploads/2021/03/logo1.png
Adams Pool Solutions offers pool renovation
Adams Pool Solutions offers pool remodeling
Adams Pool Solutions offers pool replastering
Adams Pool Solutions offers pool resurfacing
Adams Pool Solutions offers pool tile installation
Adams Pool Solutions offers commercial pool resurfacing
Adams Pool Solutions offers commercial pool construction
Adams Pool Solutions offers HOA pool renovation
Adams Pool Solutions offers pool crack repair
Adams Pool Solutions was awarded Best Pool Renovation Company in Northern California 2023
Adams Pool Solutions won Las Vegas Commercial Pool Excellence Award 2022
Adams Pool Solutions was recognized with Customer Choice Award for Pool Remodeling 2021
Efflorescence at a cement joint near the waterline ceramic tile may be from water entering at the mastic joint numerous feet away, then moving along the bond beam of light to the weakest exit point. Plaster delamination at the deep end might trace back to a membrane layer used over chalky, unscarified concrete 10 years earlier. Rust at pool light niches may point to water breach from above through an unsealed deck joint or fell short conduit seal.
Start with a proper swimming pool pipes stress test to eliminate surprise pipes leakages. If the plumbing holds stress and the water loss pattern relates to the ceramic tile line, elevated wall surfaces, or water functions, begin opening up little investigative windows. Cut out a section of grout, pry up a ceramic tile, or core a spot near a thought chilly joint. As soon as you see how the waterproofing membrane layer and coatings are split, the failing setting usually exposes itself.
When fixings involve cutting back to the shell, stand up to the temptation to do just a limited "surgical" patch with a different system. If you stop your repair right at the visible damage line, you produce an additional cold joint and an additional membrane layer shift. On substantial concerns, it is typically far better to expand the fixing zone to a sensible break, such as an edge, action, or full panel.
Long term care that safeguards the membrane you never ever see
Most proprietors and numerous solution companies never ever think about the membrane layer once the pool is filled up. That does not indicate their activities do not influence it.
Aggressive muriatic acid clean treatments, specifically duplicated ones, consume into plaster and can weaken the change in between surface and membrane layer at actions, benches, and superficial steps. Severe acid etching can compromise cementitious membranes at their surface area, making them a lot more susceptible to mini cracking.
Letting mastic joints fail and neglecting them for several years allows constant water entry at the coping line. Gradually, that dampness can work its method behind the finishes and against the membrane, especially in freeze thaw climates.
Heavy use stress washers on waterline tile can drive water behind cement and into the bond beam of light. One or two times might not matter; duplicated misuse can intensify low waterproofing details, particularly under glass mosaic ceramic tile where there is less depth of grout and thinset.
On the positive side, preserving secure water chemistry, avoiding consistent begin quit replenishing, and evaluating noticeable joints and sealants each year all help the covert membrane layer do its quiet work with much less stress.
Bringing all of it together
A swimming pool is a compound of concrete, steel, pipes, tile, rock, and specialty coatings. The waterproofing membrane layer is the silent layer that allows those products exist side-by-side without continuous conflict.
Treating that membrane layer as a system rather than a product shifts decisions about pool bond beam of light layout, dealing style, waterline ceramic tile, and even the choice between plaster, quartz accumulation finish, exposed pebble surface, PebbleTec, Hydrazzo, Diamond Brite, or all glass mosaic floor tile. It influences exactly how you execute shotcrete fixing, just how aggressively you come close to substrate scarification, and just how seriously you take information like skimmer throat fixing, swimming pool light niches, Deck-O-Seal joints, and mastic joint replacement.
Pools that age gracefully almost always share one trait: someone early at the same time respected water's perseverance and prepared for it. A well created and correctly set up waterproofing membrane layer is how you reveal that respect, maintain the pool covering completely dry and sturdy, and prevent revisiting the exact same troubles every few seasons.