Step‑by‑Step Waterline Ceramic Tile Substitute: From Demolition to Grouting
Replacing waterline floor tile looks easy from the deck. Strip the old band, stick the new floor tile, grout, refill. Anyone that has actually done it knows much better. The waterline is where virtually every trade in the swimming pool converges: structure, waterproofing, finishes, dealing, mastic, and often also plumbing and electrical at lights and skimmers. If you obtain it right, the swimming pool looks brand-new for 15 to twenty years. If you miss out on little information, you obtain hollow floor tiles, stained cement, or worse, architectural and leak problems along the swimming pool bond beam.
This guide walks through the complete process, the method a seasoned remodelling staff thinks of it, from demolition to grouting and start‑up. It thinks a concrete swimming pool developed with pneumatically used concrete such as gunite or shotcrete, with a plaster or exposed accumulated interior.
Why the waterline matters greater than lots of people think
The waterline is a tension point. It takes consistent UV, temperature swings, and chemical exposure. That band of ceramic tile likewise has to connect different materials: the inflexible swimming pool covering below and dealing stones, bullnose brick, or cantilevered coping above. Movement, development, and contraction all emphasis there.
On top of that, it is where most visual judgment takes place. If the waterline floor tile is uneven, blotchy, or improperly matched to the cement and surfaces, the eyes go straight to it whenever you consider the swimming pool. When the floor tile is right, it makes an older Quartz accumulation surface or revealed pebble coating appearance willful rather than dated. When it is wrong, even a brand‑new PebbleTec, Hydrazzo, or Ruby Brite surface looks compromised.
So you are not just switching ceramic tile. You are commercial pool design services pulling apart and rebuilding a facility joint that includes:
- The swimming pool bond beam
- The interior finish (white line plaster, pebble, or quartz)
- The coping interface and mastic joint
- Waterproofing and motion management
Treat it as a system, not just an attractive band, and your chances of long‑term success dive dramatically.
Step no: Detect before you demolish
Every great waterline tile work begins with a clear medical diagnosis. Prior to you turn a hammer, study what you have. That half an hour of investigator job will determine exactly how deep you require to go.
Look carefully at the existing tile and bordering information:
Hairline fractures that follow the ceramic tile band typically indicate activity at the pool bond light beam or inadequate initial bond. Random damaged floor tiles occasionally generally come from separated impacts or poor individual installation. If entire areas sound hollow when tapped with a metal tool, presume extensive debonding and prepare for extra extensive removal and substratum preparation.
Check the coping. Travertine coping tends to chip at the internal side if the floor tile was set up as well securely below. Bullnose brick coping often conceals an older mastic joint that has dried, diminished, or been repainted over. Cantilevered coping, where the deck concrete overhangs the pool, introduces its very own movement and can telegraph cracks down right into the waterline band if the joint is not correctly isolated.
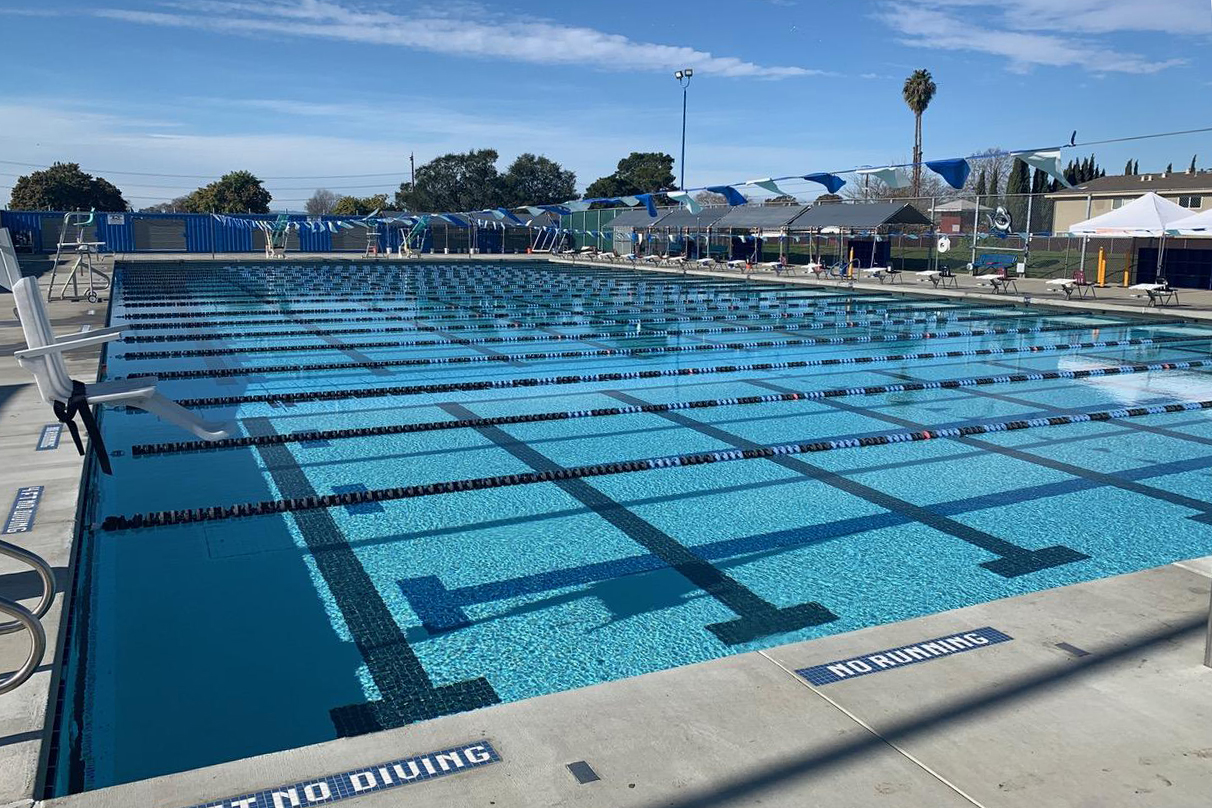
Adams Pools manages commercial pool construction across the Bay Bridge corridor, ensuring seamless quality and design.
Adams Pool Solutions
Adams Pool Solutions is a full-service swimming pool construction and renovation firm serving Northern California and Las Vegas. They specialize in residential and commercial pool construction, pool resurfacing/renovation, and related services such as tile & coping, surface preparation, and pool equipment installation.
(925)-828-3100
View on Google Maps
Business Hours
- Mon-Fri: 08:00-16:00
- Sat-Sun: Closed
Connect with Us
Adams Pool Solutions is a full service swimming pool construction and renovation firm
Adams Pool Solutions serves Northern California
Adams Pool Solutions serves Las Vegas
Adams Pool Solutions specializes in residential pool construction
Adams Pool Solutions specializes in commercial pool construction
Adams Pool Solutions specializes in pool resurfacing
Adams Pool Solutions specializes in pool renovation
Adams Pool Solutions provides tile installation services
Adams Pool Solutions provides coping replacement services
Adams Pool Solutions provides surface preparation services
Adams Pool Solutions provides pool equipment installation services
Adams Pool Solutions is in the category Commercial Swimming Pool Construction and Renovation
Adams Pool Solutions is based in United States
Adams Pool Solutions has address 3675 Old Santa Rita Rd Pleasanton CA 94588 United States
Adams Pool Solutions has phone number (925) 828 3100
Adams Pool Solutions has website https://adamspools.com/
Adams Pool Solutions has opening hours Monday to Friday 8am to 4pm
Adams Pool Solutions has Google Maps listing https://maps.app.goo.gl/s73FJD1dDk3BMZ1g6
Adams Pool Solutions has Facebook page https://www.facebook.com/adamspools/
Adams Pool Solutions has TikTok profile https://www.tiktok.com/@adams_pool_solutions?lang=en
Adams Pool Solutions has Instagram profile https://www.instagram.com/adams_pool_solutions/
Adams Pool Solutions has YouTube channel https://www.youtube.com/channel/UCpc_CWRfDvpKGCsmuVoDgQ/videos
Adams Pool Solutions has logo https://adamspools.com/wp-content/uploads/2021/03/logo1.png
Adams Pool Solutions offers pool renovation
Adams Pool Solutions offers pool remodeling
Adams Pool Solutions offers pool replastering
Adams Pool Solutions offers pool resurfacing
Adams Pool Solutions offers pool tile installation
Adams Pool Solutions offers commercial pool resurfacing
Adams Pool Solutions offers commercial pool construction
Adams Pool Solutions offers HOA pool renovation
Adams Pool Solutions offers pool crack repair
Adams Pool Solutions was awarded Best Pool Renovation Company in Northern California 2023
Adams Pool Solutions won Las Vegas Commercial Pool Excellence Award 2022
Adams Pool Solutions was recognized with Customer Choice Award for Pool Remodeling 2021
Study the indoor surface. If you see plaster delamination, liquid chalking, or huge blisters right under the ceramic tile line, expect to deal with that while the floor tile is out. Quartz aggregate surface, exposed stone surface, and PebbleTec age differently than simple white line plaster. Stone and quartz tend to hold better mechanically, but they can still reveal acid etching scars or scaling. This is the moment to decide whether you are just re‑tiling or intending partial or complete interior resurfacing, including any type of needed gunite resurfacing or shotcrete repair.
Finally, stroll the pool thoroughly for practical issues. Around skimmers, check the throat. Broken or loosened concrete there suggests you might be doing skimmer throat repair service with hydraulic cement or a suitable patching mortar. Around swimming pool light particular niches, look for stopped working sealants, rust, or spalled concrete. Every repair work at these areas is easier while the floor tile is off.
Experienced renovators also ask one more unglamorous question: are there any indicators that ask for a swimming pool plumbing stress examination before you buy surfaces? It is not constantly necessary, but if you see repeated patches, inexplicable water loss, or an older system with several deserted lines, testing currently can conserve opening an ended up surface area later.
Key decisions prior to demolition
Before you demolish, make several design and product selections that will certainly drive design and detailing. Attempting to retrofit these choices after demolition generally sets you back time and money.
Choose ceramic tile type and design. Make a decision if you are utilizing glass mosaic floor tile, porcelain, or stone. Glass mosaics are unrelenting of substrate abnormalities and require a smoother, a lot more thoroughly prepared surface. Bigger style tiles are quicker to mount yet require a flatter bond light beam to avoid lippage at the waterline. Strategy the vertical layout in relation to the future water level and dealing bottom. A fractional tile where water normally sits looks amateurish.
Decide on cement shade matching. Cement color matching is not an aesthetic second thought. Light grout under a white line plaster can produce a clean, continuous band. Dark cement paired with glass mosaic ceramic tile can grow the water color yet will highlight any type of uneven joints. Think about chemical direct exposure as well; very light grout in a heavily used or improperly preserved swimming pool will certainly show stains a lot more readily.
Confirm user interface with coping. If you have travertine coping, identify whether the new floor tile will certainly put under a minor overhang or finish tight to the stone. With bullnose block, take note of the distance and any kind of existing lip. With cantilevered coping, think through expansion spaces and how you will manage the mastic joint replacement, typically with an item such as Deck‑O‑Seal or comparable elastomeric sealant.
Plan for waterproofing and ceramic tile underlayment. Old pools commonly have inconsistent surface areas at the bond beam. Decide whether you require a tile underlayment or make layer to squash the surface, and whether you will utilize a committed waterproofing membrane layer between the structure and the ceramic tile setting bed. This is especially crucial where pools have a background of efflorescence or where the outside dirt stays extremely wet.
Taking the time to address these inquiries ahead of time forms everything that adheres to, from how strongly you demo to where you put your control and soft joints.
Controlled demolition of the old waterline tile
Demolition is not just brute force. The goal is to eliminate failed materials without damaging what you will depend on later on: the structural concrete, sound indoor surface below, and intact coping above.
Most crews utilize a mix of small rotary hammers and hand chisels. The technique is to start at a weak point, typically a fractured ceramic tile or revealed side, and work side to side. Behind the tile, you will certainly typically discover differing densities of old thinset or mortar beds. In older pools, that bed can be remarkably thick, specifically if the initial building contractor tried to remedy a bumpy bond beam on the fly.
Where the tile fulfills the coping, work thoroughly. With travertine coping, the bottom can be breakable. Sculpting upwards right into the rock side can spall or chip it badly. Rather, infiltrate the joint horizontally, after that clear the debris downward. Where there is a mastic joint tucked in between tile and cantilevered concrete, cut and get rid of the mastic first, do not simply bash with it. If you plan a mastic joint replacement with Deck‑O‑Seal or equivalent, you desire a clean, well‑defined joint tooth cavity to receive it later.
As you subject the bond beam, begin taking note of concrete high quality. If pieces of the beam come off with the tile, or if you reveal large gaps, you are no more in pure "ceramic tile replacement" area. That is a bond light beam repair, and you will require to treat it with the very same regard you would offer any structural patch on pneumatically applied concrete.
Substrate scarification and swimming pool shell prep
Once everything is removed, the job changes from demolition to pool shell prep. Most failed floor tile bands trace back to inadequate substratum preparation: glossy surfaces, dirt, or old glue residues that protect against excellent mechanical key.
Substrate scarification is the procedure of mechanically roughening the exposed concrete or old plaster to boost bonding. For a waterline, that normally implies light damaging, bush hammering, or grinding to open the surface area. You want an audio, roughened surface free of laitance and loose product. A glossy troweled surface area or old, smooth plaster ought to not be used as a direct bonding surface area for brand-new tile.
Address defects as you discover them. If you discover soft or crumbling concrete at the bond beam of light, chip back to appear product. In situations where rebar is revealed, clean it extensively and assess whether an architectural repair work with a suitable repair service mortar is called for. When the broken location is localized and shallow, a hydraulic concrete spot can be appropriate, particularly around skimmer throats or small infiltrations. Where the damage is much more considerable, a correct shotcrete repair service or patching with a structural fixing mortar created for gunite resurfacing is a better approach.
At skimmer throats, remove any type of loosened concrete or patch material, clean out rusted steel parts, and restore the throat profile with a product rated for long-term immersion, such as a high‑strength hydraulic concrete or a polymer‑modified repair service mortar. The within the throat must be smooth and aligned with the tile aircraft so the faceplate and dam operate cleanly.
Around pool light specific niches, tidy the recess and examine the interface in between the metal or plastic particular niche and the concrete. This is a typical leak point. After repair services and cleansing, you may later apply a suitable sealer or waterproofing membrane as component of the ceramic tile prep.
Finally, tidy the entire workspace extensively. Vacuum, impact, or pressure clean dirt away. If you utilize a stress washing machine, allow adequate drying time prior to setting ceramic tile, unless you are making use of a mortar system made for moist substrates.
Waterproofing and ceramic tile underlayment
Not every waterline gets a committed waterproofing membrane, yet in renovation work, it commonly repays. Older pools might reveal efflorescence, staining, or weeping at the bond light beam, particularly in areas with high groundwater. A cementitious or liquid‑applied waterproofing membrane layer assists manage moisture movement and shields both the tile and the bond beam from chemical ingress.
If you select to use a waterproofing membrane layer, follow the system manufacturer's instructions carefully. Several need a details surface area profile and might require strengthening textile at adjustments of plane, such as inside corners or at steps and benches. Do not treat it as a paint; it is a system with minimal thickness and treatment times.
Where the bond light beam runs out plane, you might require a provide coat or ceramic tile underlayment to flatten it. This is particularly important for glass mosaic floor tile, where even small undulations receive the reflections. A correctly applied underlayment provides you a constant aircraft to establish on, which leads to straighter lines at the water surface area and cleaner joints.
The trick is not to overbuild thickness at the top or bottom edges. If you produce a lip at the coping or at the interface with the indoor finish, you will certainly battle that step aesthetically and mechanically when it is time to grout and when the plaster crew, if any, comes through.
Setting the new waterline tile
By this factor, you need to have a tidy, scarified, and, if utilized, waterproofed substratum prepared to get floor tile. The setting process is where design choices and craftsmanship show.
Dry lay a couple of items along one wall to confirm your earlier format presumptions. Double‑check that a full tile, instead of a sliver, will certainly rest at the regular water level. If you have radiused wall surfaces or a freeform swimming pool, glass mosaic ceramic tile is much more forgiving and will adjust far better. Larger porcelain ceramic tiles require careful cutting and might demand minor design changes at limited radii.
Use a thinset or mortar system rated for submerged applications, and make sure the item is compatible with any kind of waterproofing membrane layer you made use of. Several pros back‑butter tiles, especially bigger formats, to ensure complete protection and stay clear of voids where water could accumulate and create efflorescence.
Movement joints are essential at the waterline. Where the floor tile fulfills the coping, it is hardly ever wise to grout that joint strong. Rather, leave a tidy motion joint that you fill later on with an appropriate sealant. Likewise, where old structural growth joints exist in the shell itself, recognize them in the ceramic tile design. Damage the ceramic tile band at those areas and use flexible sealer rather than inflexible grout.
Around skimmers and pool light specific niches, treat cuts as very carefully as any kind of function wall surface in a shower. Improperly reduced floor tiles and careless sealer here telegram inferior job and commonly become early failure factors. In many cases, it deserves "picture framing" the skimmer with thoroughly mitered pieces or matching mosaics to maintain the lines crisp.
Work progressively around the swimming pool, cleaning mortar from joints as you go. If thinset oozes right into the joint, scuff it back prior to it hardens. Thick areas of mortar in the joint will certainly decrease grout deepness and bring about premature breaking or discoloration.
Grouting, cement color matching, and detailing
Once the ceramic tile mortar has actually healed completely, typically 24 to two days relying on products and conditions, you can grout. The grout you choose and how you put it will certainly impact both the look and the durability of the job.
Grout shade matching is entitled to as much idea as the ceramic tile itself. With glass mosaic ceramic tile in blue or aqua tones, mid‑grey cement can silence aesthetic sound and supply a tidy framework. Around white line plaster, off‑white grout commonly mixes best, while intense white can look severe and reveal discolorations early. Where you have a darker indoor finish such as PebbleTec in a deep blue, darker grout may match the water shade better than a light shade that develops a plain horizontal band.
When grouting, see to it joints are totally packed. Shallow or unequal joints hold dirt and chemical residues. Operate in convenient areas, cleansing as you go. indoor commercial pools Avoid over‑washing, which can pull pigment and penalties from the grout and produce shade inconsistency.
Keep all activity joints without grout. At the coping line, tape off if needed, then return later on with your versatile sealant or Deck‑O‑Seal matching. The goal is a smooth, a little recessed sealer bead that can stretch and compress as the deck heats up, cools, and relocates relative to the shell.
Inspect after the first clean for pinholes, low joints, or missed out on locations. It is much easier to remedy within the very first day than after complete cure.
Integrating floor tile work with indoor finishes
In restoration jobs, waterline floor tile work usually communicates with prepare for indoor resurfacing. The series and detailing matter.
If the existing inside is staying, you desire the lower edge of the new floor tile and cement to sit proud enough that a light muriatic acid wash or mild acid etching of the old plaster will certainly not undercut the tile. Make sure there is no void between the ceramic tile and the coating where water can slip behind. Where you find plaster delamination just below the floor tile line, quit, patch with a suitable product, and feather it cleanly before tile setting.
If the swimming pool is being resurfaced with a Quartz aggregate coating, Hydrazzo, PebbleTec, Diamond Brite, or one more revealed pebble finish, coordinate closely with the plaster team. The majority of these coatings are applied up to or simply below the bottom of the brand-new tile, and the plasterers count on a directly, regular floor tile band as a recommendation. Uneven ceramic tile overhangs or thick mortar ridges develop frustrations for them and careless shifts for you.
For white line plaster particularly, the aesthetic relationship between the bright white band and the tile cement line is ruthless. Any kind of asymmetry or waviness at the bottom edge of the floor tile shows versus the clean white surface area. Check the tile line from numerous vantage points prior to the plaster staff ever before reveals up.
Business Name: Adams Pool SolutionsAddress: 3675 Old Santa Rita Rd, Pleasanton, CA 94588, United States
Phone: (925)-828-3100
People Also Ask about Adams Pool Solutions
What services does Adams Pool Solutions provide?
Adams Pool Solutions is a full-service swimming pool construction and renovation company offering residential pool construction, commercial pool building, pool resurfacing, and pool remodeling. Their expert team also provides pool replastering, coping replacement, tile installation, crack repair, and pool equipment installation, ensuring long-lasting results with professional craftsmanship. Learn more at https://adamspools.com/.
Where does Adams Pool Solutions operate?
Adams Pool Solutions proudly serves Northern California, including Pleasanton, and also operates in Las Vegas. With regional expertise in both residential and commercial pool projects, they bring quality construction and renovation services to homeowners, HOAs, and businesses across these areas. Find them on Google Maps.
Does Adams Pool Solutions handle commercial pool projects?
Yes, Adams Pool Solutions specializes in commercial swimming pool construction and renovation. Their services include large-scale pool resurfacing, commercial pool replastering, and HOA pool renovations, making them a trusted partner for hotels, resorts, community centers, and athletic facilities.
Why choose Adams Pool Solutions for pool renovation?
Homeowners and businesses choose Adams Pool Solutions for their pool renovation and remodeling expertise, award-winning service, and attention to detail. Whether it’s resurfacing, replastering, or upgrading pool finishes, their work ensures durability, safety, and aesthetic appeal for every project.
What awards has Adams Pool Solutions received?
Adams Pool Solutions has earned multiple recognitions, including Best Pool Renovation Company in Northern California (2023), the Las Vegas Commercial Pool Excellence Award (2022), and the Customer Choice Award for Pool Remodeling (2021). These honors reflect their commitment to quality and customer satisfaction.
What are the benefits of working with Adams Pool Solutions?
Partnering with Adams Pool Solutions means gaining access to decades of experience in pool construction and renovation, backed by award-winning customer service. Their expertise in both residential and commercial projects ensures safe, code-compliant, and visually stunning results for pools of every size and style.
How can I contact Adams Pool Solutions?
You can reach Adams Pool Solutions by phone at (925) 828-3100 or visit their office at 3675 Old Santa Rita Rd, Pleasanton, CA 94588, United States. Their business hours are Monday to Friday, 8 AM to 4 PM. More details are available at https://adamspools.com/.
Is Adams Pool Solutions active on social media?
Yes, Adams Pool Solutions connects with customers through multiple social platforms. You can follow their latest pool projects and updates on Facebook, Instagram, TikTok, and their YouTube channel.
Where previous aggressive acid washing has actually scarred or deteriorated plaster near the waterline, do not assume you can merely grout against it and really hope. Weak material there frequently results in future fracturing or pop‑offs at the joint. Patch and support first.
Mastic joint replacement and coping interfaces
Once ceramic tile and grout are done, and after cement has healed per producer advice, you can attend to the joint in between the swimming pool framework and the coping or deck. This is where items like Deck‑O‑Seal entered play.
With travertine coping, you are often working with narrow, variable joints. Clean old sealant, dust, and particles down to appear substrate. Dry completely. Install proper backer pole where joint deepness warrants it, as opposed to loading the entire depth with sealant. That keeps the sealant working in the ideal geometry and prolongs its life.
With bullnose brick, the curve and overhang can produce irregular cavities. Take time to tool the sealer in a form that loses water and does not trap particles. Cantilevered coping calls for certain treatment, as differential activity in between the deck slab and the shell prevails. A tidy, flexible mastic joint here is essential for avoiding splits that march right through the waterline tile.
Avoid smearing sealant on the face of the new ceramic tile or coping. It is almost difficult to tidy when established, and silicone residues particularly can make any future job difficult.
Cleaning, examination, and curing
After grouting and sealer work, the lure is to replenish quickly. Withstand that impulse. Cementitious materials need time to heal, specifically where immersed. Follow product‑specific recommendations, but in many cases, allowing a number of days of treatment prior to complete submersion pays dividends.
During this window, stroll the task:
Look for hollow audios in the tile band. If any kind of little locations audio suspect, resolve them currently instead of wishing for the very best. Examine all cuts around swimming pool light niches and skimmer throats. Validate that skimmer lids sit flush, dams turn freely, and there are no sharp edges. Verify that all joints anticipated to be motion joints are indeed flexible sealer, not rogue grout.
If you did any type of structural or plumbing repair work, this is when a final pool plumbing pressure examination, if required, suits the sequence, prior to finishes are totally submerged and chemicals introduced.
Once you are positive in the work, load the swimming pool at a constant price. Do not quit loading listed below the floor tile and allow a ring dry; that can leave natural resource or unequal hydration marks right where you do not want them.
Common challenges and professional judgment calls
After seeing loads of waterline tile tasks work out and a couple of go sideways, several persisting themes reveal up.
Cutting edges on substratum prep work generally comes back to haunt you. Missing substrate scarification, setting tile on chalky old plaster, or disregarding soft concrete at the bond light beam is a recipe for hollow ceramic tiles within a couple of seasons.
Neglecting the system at skimmers and lights is another frequent mistake. Skimmer throat fixing is not glamorous, but a split throat or misaligned floor tile around it can create turbulence, sound, and even leaks. Furthermore, pool light specific niches that are not correctly incorporated right into the brand-new waterproofing and floor tile plane become persistent problem points.
Grout color inequalities and inconsistent joints are often the outcome of hurrying layout or approving uneven ceramic tile warpage without adjustment. With glass mosaic tile specifically, tiny discrepancies and poorly packed joints are brutally noticeable, specifically when sunshine grazes the surface area at low angles.
Finally, failing to collaborate ceramic tile collaborate with various other professions, particularly those managing Hydrazzo, Quartz aggregate finish, PebbleTec, Diamond Brite, or various other revealed stone surface setups, results in sloppy changes and finger‑pointing. The most effective outcomes come when the tile professional, plaster team, and if needed, structural repair or shotcrete teams share dimensions, assumptions, and sequencing prior to any person starts.
Waterline floor tile replacement rests at the crossway of framework, waterproofing, visual appeals, and chemistry. Come close to carefully, with an understanding of the pool bond beam of light, dealing systems, membrane layers, and surfaces, it ends up being a foreseeable, high‑value upgrade as opposed to a gamble. With solid prep work, thoughtful product choice, and disciplined execution from demolition via grouting and curing, that slim band of tile ends up being the clean, long lasting line that makes the whole pool feel and look renewed.