
Making Use Of Hydraulic Cement to Repair Service Cracks Around Skimmers and Fittings
Cracks around skimmers, returns, and swimming pool light specific niches are small details that commonly choose whether a pool stays tight and tidy or turns into a recurring frustration. Those hairlines in the skimmer throat, the damaged side around a suitable, the separated joint under the waterline ceramic tile, every one of them sit right where water, movement, and chemicals work hardest. If they are not managed with the appropriate materials and technique, they maintain coming back.
Hydraulic cement is among one of the most valuable products for these repairs, but it is likewise one of one of the most mistreated. I have actually seen it troweled over moving fractures like spackle, obstructed right into adaptable joints that need to have been entrusted to a sealant, and smeared over ceramic tile and coping stones where it had no service being. Made use of properly, it can lock up leakages around rigid penetrations for several years. Used thoughtlessly, it becomes a bandage that hides bigger architectural or plumbing issues.
What complies with is a useful walk‑through of exactly how knowledgeable pool trades make use of hydraulic concrete specifically around skimmers, installations, and other infiltrations, and exactly how to incorporate it with coatings like waterline floor tile, PebbleTec, and quartz aggregate surfaces so the repair service does not telegram via the surface.
Why fractures create at skimmers and fittings
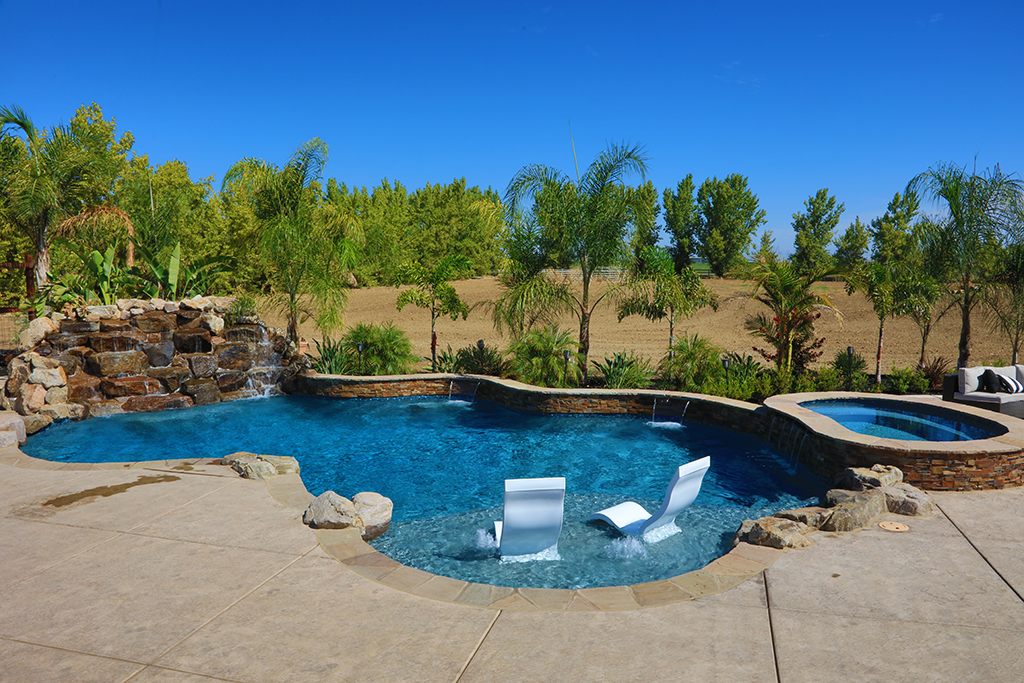
If you check out a sample of a swimming pool around the waterline, you see a lot of different products stacked together. The swimming pool shell is gunite or shotcrete, pneumatically applied concrete that creates the framework. On top of the pool bond beam you might have waterline ceramic tile, ceramic tile underlayment, and grout, with travertine coping, bullnose brick, or a cantilevered coping connected into the deck. Inside, the covering lugs a plaster or aggregate surface such as PebbleTec, Hydrazzo, Diamond Brite, or a simple white line plaster.
Every one of those products increases and acquires at a various rate. The dirt under the framework swells and shrinks. The water in the pool warms and cools. Skimmer bodies and light specific niches are normally inflexible plastic or steel established into that concrete structure, with plumbing glued to the back. Over years, that mix of movement, water pressure, and chemical direct exposure concentrates stress right at the interface in between the shell and the plastic fittings.
Typical crack situations around skimmers and fittings include:
If the pool is older, you might likewise see the outcomes of prior "fixings" where straight mortar or typical cement were smeared in without attention to bond or waterproofing. Those products generally diminish, debond, and leak again.
Hydraulic cement behaves differently. It is formulated to set rapidly in the presence of water, broaden somewhat as it remedies, and produce a dense, relatively impenetrable plug. That makes it a solid prospect near skimmers and installations, if the underlying framework is sound.
When hydraulic cement is the right option (and when it is not)
Before you grab the container of hydraulic cement, it aids to be clear about what issue you are actually solving.
Hydraulic cement excels when you require to:
- Fill stiff splits, spaces, or honeycombing in concrete or the swimming pool covering around a non‑moving penetration.
- Stop small active seepage via the covering at a joint in between concrete and plastic or metal.
- Build a solid, high‑bond base for a later surface, such as waterline ceramic tile, glass mosaic tile, or a new plaster or quartz aggregate finish.
Hydraulic concrete is not the tool for problems that involve ongoing activity or flexible joints. Lengthy horizontal joints between deck and coping, development joints behind cantilevered coping, or the interface in between deck and swimming pool covering need to typically be re‑established with correct mastic joint replacement using products like Deck‑O‑Seal, not rigid cement. Attempting to "lock" those joints with hydraulic cement almost assures cracking.
Similarly, if the swimming pool covering itself is structurally jeopardized, or if a pool pipes pressure examination reveals leakages in the lines, loading hydraulic concrete around the skimmer throat might hide signs without curing the underlying issue. In those cases, you may be considering a lot more considerable gunite resurfacing, shotcrete fixing, or skimmer substitute instead of a straightforward split patch.
A beneficial general rule: utilize hydraulic concrete where the concrete is planned to be monolithic and inflexible, and where the split is more of a void or leakage path than a development joint.
Evaluating the crack and surrounding finishes
Good repair services begin with a cautious inspection. Around skimmers, returns, and swimming pool light niches, I check out a number of layers: structure, coating, and movement.
At the structural degree, inspect the swimming pool covering and pool bond beam. Tap with a hammer or the deal with of a trowel and listen for hollow places. If the area around the skimmer rings strong, you are taking care of a local fracture or bond loss. If several feet of bond light beam noise hollow, you might be handling larger delamination or stopping working shotcrete.
Next, research the coating. A Quartz aggregate surface or revealed pebble finish behaves in a different way from a smooth white plaster. PebbleTec and similar coatings have a textured surface area that hides small variants in spot color but makes it more challenging to match accumulated dimension. Hydrazzo and Diamond Brite, with their brightened or shimmer textures, call even more attention to spots. Waterline tile and glass mosaic floor tile require careful placement and grout shade matching if you will certainly be removing and resetting any pieces.
Look carefully at the skimmer throat. Splits at the corners of the skimmer opening, locations where the plaster or ceramic tile underlayment has actually divided from the plastic, and voids behind loose tile pieces in the throat prevail. Real skimmer throat fixing commonly includes cutting down finishes to reveal audio concrete completely around the plastic body.
Around fittings and swimming pool light niches, check for hairline rings where the plaster has actually debonded from the fitting collar, and for any indicators of active leak, such as efflorescence or damp streaks on the behind of the shell if you can access it from a vault or tools room.
Finally, note any activity. If you can open up and close the fracture with light leverage from a screwdriver, or if you see daylight through a joint that grows and shrinks with temperature, that need to continue to be an adaptable joint, not a stiff hydraulic cement patch.
Proper pool shell preparation before hydraulic cement
The most usual error I see with hydraulic concrete repairs is bad prep work. Concrete and plaster are ruthless; if you do not prep properly, the very best patch material on the planet will certainly not conserve the job.
Think in regards to three goals: reveal audio substratum, roughen it, and clean it.
Adams Pools provides top-tier commercial pool construction for institutional projects near Stanford University.
Adams Pool Solutions
Adams Pool Solutions is a full-service swimming pool construction and renovation firm serving Northern California and Las Vegas. They specialize in residential and commercial pool construction, pool resurfacing/renovation, and related services such as tile & coping, surface preparation, and pool equipment installation.
(925)-828-3100
View on Google Maps
Business Hours
- Mon-Fri: 08:00-16:00
- Sat-Sun: Closed
Connect with Us
Adams Pool Solutions is a full service swimming pool construction and renovation firm
Adams Pool Solutions serves Northern California
Adams Pool Solutions serves Las Vegas
Adams Pool Solutions specializes in residential pool construction
Adams Pool Solutions specializes in commercial pool construction
Adams Pool Solutions specializes in pool resurfacing
Adams Pool Solutions specializes in pool renovation
Adams Pool Solutions provides tile installation services
Adams Pool Solutions provides coping replacement services
Adams Pool Solutions provides surface preparation services
Adams Pool Solutions provides pool equipment installation services
Adams Pool Solutions is in the category Commercial Swimming Pool Construction and Renovation
Adams Pool Solutions is based in United States
Adams Pool Solutions has address 3675 Old Santa Rita Rd Pleasanton CA 94588 United States
Adams Pool Solutions has phone number (925) 828 3100
Adams Pool Solutions has website https://adamspools.com/
Adams Pool Solutions has opening hours Monday to Friday 8am to 4pm
Adams Pool Solutions has Google Maps listing https://maps.app.goo.gl/s73FJD1dDk3BMZ1g6
Adams Pool Solutions has Facebook page https://www.facebook.com/adamspools/
Adams Pool Solutions has TikTok profile https://www.tiktok.com/@adams_pool_solutions?lang=en
Adams Pool Solutions has Instagram profile https://www.instagram.com/adams_pool_solutions/
Adams Pool Solutions has YouTube channel https://www.youtube.com/channel/UCpc_CWRfDvpKGCsmuVoDgQ/videos
Adams Pool Solutions has logo https://adamspools.com/wp-content/uploads/2021/03/logo1.png
Adams Pool Solutions offers pool renovation
Adams Pool Solutions offers pool remodeling
Adams Pool Solutions offers pool replastering
Adams Pool Solutions offers pool resurfacing
Adams Pool Solutions offers pool tile installation
Adams Pool Solutions offers commercial pool resurfacing
Adams Pool Solutions offers commercial pool construction
Adams Pool Solutions offers HOA pool renovation
Adams Pool Solutions offers pool crack repair
Adams Pool Solutions was awarded Best Pool Renovation Company in Northern California 2023
Adams Pool Solutions won Las Vegas Commercial Pool Excellence Award 2022
Adams Pool Solutions was recognized with Customer Choice Award for Pool Remodeling 2021
Start by cutting back all loose or weak material. For a fracture along a skimmer throat, that typically implies making use of a small breaking hammer or angle grinder with a ruby blade to open the fracture into a "V" or "U" groove and to damage slightly so the patch can mechanically lock in. For gaps around fittings, get rid of a ring of plaster or exposed pebble finish up until you see solid, well‑bonded material. This is a type of substratum scarification: you are not just cleansing the surface, you are deliberately roughing up and forming it for better bond.
Avoid just smearing hydraulic cement over existing plaster if the plaster bond is suspect. The bond chain is just as strong as its weakest layer. If the plaster is currently in the beginning of plaster delamination, hydraulic cement ahead will stop working along with it.
Once you have your repair area cut back, roughen the concrete or shell surface. A bush hammer, rough grinding cup, and even sharp sculpt job can create sufficient profile. For extreme honeycombing in pneumatically applied concrete, you may require to chip out numerous inches to reach dense product before rebuilding.
Cleaning is not simply a fast rinse. A proper muriatic aquatic facility construction acid clean, thinned down properly, can help get rid of laitance, scale, and contaminants, yet it needs to be complied with by a comprehensive neutralization and rinse. In skimmer throats and around fittings, I commonly make use of a combination of cord brushing, pressure cleaning, and a light acid etching pass, after that permit the location to return to a saturated surface dry condition before positioning hydraulic cement.
Saturated surface area completely dry indicates the concrete is totally wet yet without standing water or puddles. Hydraulic concrete likes dampness, however way too much free water can damage the mix at the interface and trigger it to float or clean out.
If the fracture converges a real expansion joint or if you are functioning near the deck‑to‑coping mastic joint, secure that joint. Do not allow hydraulic concrete to bridge where you expect to re-install an adaptable mastic. Mask or area backer pole as needed.
Tools and products that make the work smoother
Here is a compact checklist of devices and products that normally cover most hydraulic concrete repairs around skimmers and fittings:
You may not require all of these on every repair service, yet on a real‑world swimming pool remodel, most of them appear of the truck faster or later.
Step by‑step repair work around a skimmer throat
Every pool is different, however a normal skimmer throat fixing with hydraulic cement adheres to a series comparable to this:
That series thinks that the skimmer itself is structurally audio and that you have actually not uncovered fell short plumbing. If throughout demonstration you see fractured skimmer walls, damaged pipe stubs, or water intrusion behind the skimmer body, stop and think about much more substantial skimmer replacement with new gunite or shotcrete fixing around it, and execute a swimming pool plumbing stress examination prior to shutting every little thing back up.
Integrating the spot with waterline floor tile and coping
The hydraulic concrete patch is only the architectural core of the repair service. A big part of making the job last and look appropriate depend on just how you dress it with tile and dealing details.
At the waterline, floor tile underlayment mortar need to bond highly both to the hydraulic concrete and to the surrounding pool shell. Several pros use a polymer‑modified thinset or medium‑bed mortar, occasionally over a roll‑on waterproofing membrane that extends the repair. The waterproofing membrane layer offers 2 purposes: it lowers the risk of wetness transmission through the patch that might stain floor tile or grout, and it helps decouple small micro‑movement in between old and brand-new materials.
When reinstating waterline tile around the skimmer mouth, take notice of the geometry of the skimmer throat and the coping side. Travertine coping and bullnose brick have their very own overhang profiles. On pools with a cantilevered coping, the deck itself develops the overhang, typically with a mastic joint right behind the ceramic tile line. Ensure your floor tile positioning respects those existing lines to ensure that the skimmer dam door clears openly and the waterline sits properly under the coping.
Grout shade matching is often what gives away a repair service. I have actually matched loads of cement joints around older glass mosaic tile bands where the floor tile was still excellent, yet the substrate and cement had fallen short near the skimmer. Take a tiny piece of the existing grout to your vendor preferably, or prepare tiny examination examples. Small color differences are much less noticeable at corners and terminations, so intend your shifts accordingly.
Where the fixing climbs up onto the bond light beam or methods dealing rocks, determine where inflexible materials need to quit and versatile sealants ought to begin. If Deck‑O‑Seal or comparable mastic was initially utilized in between coping and deck, that detail has to be maintained. Do not link it with mortar or hydraulic cement. The growth space there protects the bond beam of light and the ceramic tile band from deck movement.

Matching indoor coatings over hydraulic cement
The hydraulic cement repair work does not stay in seclusion; it at some point goes away under an indoor coating. Just how that surface is set up over the spot matters, particularly with high‑end options.
On a standard plaster or white line plaster swimming pool, the plaster team will certainly usually deal with the hydraulic cement location like any type of other section of fixed covering. Good pool plasterers try to find consistent absorption, sufficient mechanical account, and tidy, solid user interfaces. If the hydraulic cement was put recently, they may damp it down or gently sand it to remove laitance prior to plastering.
Quartz accumulation surface and Ruby Brite kind products are slightly a lot more flexible aesthetically, due to the fact that their mottled surface and shade variation assists conceal minor differences. Still, differential suction between patch and initial shell can leave subtle shading. A bonding coat or scratch coat over the whole area can aid normalise that.
Exposed pebble surface, PebbleTec, and similar products require a little bit even more focus. The rough texture of the patch must approximate the initial shell account so the pebble mix is an also thickness almost everywhere, particularly near fittings and skimmer throats. If the spot protrudes or is recessed, the pebble layer will certainly slim or thicken, which can alter how the accumulation presents and just how well it bonds.
Hydrazzo and various other refined finishes intensify the challenge, due to the fact that the grinding and brightening stages can telegraph any type of adjustment in firmness between patch and initial covering. Hydraulic cement is generally fairly thick, yet if you feathered it too thin at the edges, the polishing machines might melt with faster. Leaving a tidy, well‑defined border that is fully covered by the finish helps.
In any situation, communicate with the plaster or surface crew. Allow them recognize where hydraulic concrete spots exist, how long they have healed, and what items you made use of. That openness allows them to adapt their swimming pool covering prep, acid etching, and application to decrease aesthetic transitions.
Dealing with returns, light particular niches, and various other fittings
Beyond skimmers, hydraulic concrete shines around penetrations that ought to stay rigid about the covering: return lines, vacuum ports, and pool light niches.
For return fittings, lots of smaller sized repair services include reducing a round ring of plaster or aggregate around the suitable face, cleaning up back to solid shell and the suitable collar, then packing hydraulic cement into any kind of spaces or radial fractures. The trick is to incorporate the spot so the plaster or pebble around the fitting has a strong, consistent backing. If the collar floats in a pocket of air, that location will ultimately split in a ring and leak.
Pool light particular niches deserve special care. The specific niche body, conduit, and bonding connections all stay in that area. If you are patching splits around a light specific niche with hydraulic cement, shut down the circuit, confirm bonding honesty, and avoid enclosing the bonding lug or flexible installing hardware in strong cement. Patching need to reinforce the concrete and seal leakages, not hide essential solution points.
Sometimes I see older pools where the specific niche collar has drawn somewhat far from the covering as a result of rust or movement. Hydraulic concrete can load deep space behind the collar, but only if you can verify that the particular niche body is structurally stable and that the conduit run behind it passes a stress or leak test. Otherwise, you might be delaying a more major repair.
Structural repair work and hydraulic concrete as component of a bigger plan
On some tasks, split repair service around skimmers and fittings is just a tiny component of a wider rehab. Comprehensive cracking along the bond light YMCA pool construction beam, coping motion, or evident covering shifting may require architectural work.
Gunite resurfacing and shotcrete repair work can rebuild damaged areas of the covering or bond beam. In those jobs, hydraulic concrete commonly offers in a more local role: stopping energetic leakages throughout preparation, plugging kind connection openings, or securing separated voids prior to new pneumatically applied concrete connections every little thing together.
A full structural rebuild might involve removing and resetting travertine coping, retiling waterline bands, changing skimmers completely, and afterwards integrating brand-new shotcrete with existing shell sections. Each skimmer throat and installation still needs careful outlining, yet the context is various: hydraulic cement turns into one piece in a layered system that includes reinforcing steel, brand-new shotcrete, waterproofing membranes, floor tile, coping, and versatile growth joints.
Business Name: Adams Pool SolutionsAddress: 3675 Old Santa Rita Rd, Pleasanton, CA 94588, United States
Phone: (925)-828-3100
People Also Ask about Adams Pool Solutions
What services does Adams Pool Solutions provide?
Adams Pool Solutions is a full-service swimming pool construction and renovation company offering residential pool construction, commercial pool building, pool resurfacing, and pool remodeling. Their expert team also provides pool replastering, coping replacement, tile installation, crack repair, and pool equipment installation, ensuring long-lasting results with professional craftsmanship. Learn more at https://adamspools.com/.
Where does Adams Pool Solutions operate?
Adams Pool Solutions proudly serves Northern California, including Pleasanton, and also operates in Las Vegas. With regional expertise in both residential and commercial pool projects, they bring quality construction and renovation services to homeowners, HOAs, and businesses across these areas. Find them on Google Maps.
Does Adams Pool Solutions handle commercial pool projects?
Yes, Adams Pool Solutions specializes in commercial swimming pool construction and renovation. Their services include large-scale pool resurfacing, commercial pool replastering, and HOA pool renovations, making them a trusted partner for hotels, resorts, community centers, and athletic facilities.
Why choose Adams Pool Solutions for pool renovation?
Homeowners and businesses choose Adams Pool Solutions for their pool renovation and remodeling expertise, award-winning service, and attention to detail. Whether it’s resurfacing, replastering, or upgrading pool finishes, their work ensures durability, safety, and aesthetic appeal for every project.
What awards has Adams Pool Solutions received?
Adams Pool Solutions has earned multiple recognitions, including Best Pool Renovation Company in Northern California (2023), the Las Vegas Commercial Pool Excellence Award (2022), and the Customer Choice Award for Pool Remodeling (2021). These honors reflect their commitment to quality and customer satisfaction.
What are the benefits of working with Adams Pool Solutions?
Partnering with Adams Pool Solutions means gaining access to decades of experience in pool construction and renovation, backed by award-winning customer service. Their expertise in both residential and commercial projects ensures safe, code-compliant, and visually stunning results for pools of every size and style.
How can I contact Adams Pool Solutions?
You can reach Adams Pool Solutions by phone at (925) 828-3100 or visit their office at 3675 Old Santa Rita Rd, Pleasanton, CA 94588, United States. Their business hours are Monday to Friday, 8 AM to 4 PM. More details are available at https://adamspools.com/.
Is Adams Pool Solutions active on social media?
Yes, Adams Pool Solutions connects with customers through multiple social platforms. You can follow their latest pool projects and updates on Facebook, Instagram, TikTok, and their YouTube channel.
In that context, finest practice is constantly to confirm plumbing stability with a swimming pool plumbing pressure test prior to you shut any type of architectural work. It is much simpler to go after and repair a leaking skimmer line, return, or light conduit when whatever is open, than after you have set up brand-new coping and coatings over the area.
Practical judgment from the field
Hydraulic cement is stealthily easy to blend and use. That simplicity can welcome faster ways that set you back money and time later on. A couple of lessons that keep persisting on genuine projects:
If a split maintains reopening, deal with the reason, not the sign. Repeated failures around the very same skimmer edge usually indicate a loose skimmer body, a failing bond beam, or missing out on development lodging in the deck and coping. Hydraulic concrete alone will not fight continuous structural movement.
Respect the difference in between waterproofing and structure. Hydraulic concrete is dense and rather water-proof, but matching it with a specialized waterproofing membrane layer in essential zones like skimmer throats and light particular niches adds redundancy. When that membrane layer is appropriately connected into tile underlayment and shell preparation, it allows the indoor finish to concentrate on aesthetics and put on instead of leakage prevention.
Plan your repair service around future work. If a significant resurfacing is prepared, or a brand-new waterline ceramic tile band will certainly be mounted, phase the hydraulic concrete repairs to support that work: bigger, cleaner repair work locations with ideal scarification and cure time make it simpler for finish crews to accomplish a seamless result.
Finally, match the repair range to the pool's worth and use. On a standard domestic pool with a common white plaster, you may prioritize function over best invisibility. On a high‑end project with Hydrazzo inside, travertine coping, and glass mosaic ceramic tile, the criterion for mixing, grout shade matching, and geometric alignment is far higher. The hydraulic concrete job should show that expectation.
Handled attentively, hydraulic cement ends up being a trusted ally around skimmers and installations. It locks up leakages where strength belongs, sustains beautiful finishes at the waterline, and expands the life of swimming pools that deserve a 2nd or third decade of service.