
From Rough to Refined: Converting a Revealed Pebble Finish to Hydrazzo
Anyone that has actually lived with a revealed stone coating for a couple of seasons knows the trade. Pebble pools are tough, forgiving of chemical swings, and they hide dust far better than smooth plaster. They are additionally harsh on bare feet, hard on swimming pool playthings, and they never ever rather provide that mirror-like water you see in high‑end domestic tasks and store hotels.
Hydrazzo rests at the other end of that range. It is still a cementitious, accumulated surface, yet the feeling underfoot is silkier, and when it is applied and brightened appropriately, the water looks deeper, cleaner, and much more consistent. Transforming from a subjected pebble finish to Hydrazzo is entirely feasible, yet it is not as straightforward as "chip and replaster." You are altering the character of the vessel, which suggests taking the framework, the waterproofing, and the details around the waterline just as seriously as the new surface.
What adheres to reflects just how knowledgeable plaster and tile staffs in fact approach this kind of task, not just what the pamphlets promise.
Why homeowners make the switch
Most clients come to Hydrazzo from PebbleTec or other exposed pebble systems for among three reasons.
First, the tactile experience. Children whine about damaged toes. Swimmers end up with worn areas on their feet from switching on the wall surface. Over time, even a fairly fine stone blend feels harsher as the concrete matrix erodes and extra accumulated stands proud.
Second, looks. A quartz accumulation finish or a fresh pebble surface can look excellent, however it hardly ever offers the uninterrupted, almost lustrous appearance that a refined Hydrazzo surface area does. With pebble, you constantly see the structure. With Hydrazzo, you see light play.
Third, age and failing. Many revealed stone finishes last 15 to twenty years if chemistry is good. By the time a property owner is thinking about a full resurfacing, there might be stains that a simple muriatic acid laundry can not get rid of, locations of plaster delamination, and splits that indicate shell activity or bond issues. If you are mosting likely to go through the disruption of draining, chipping, and refinishing, most individuals make a decision to invest in a surface that plainly upgrades the pool instead of just resetting the clock.
Looking past the surface area: what should be examined first
Before any individual speak about shade charts and glass mosaic floor tile accents, the shell and surrounding information have to be evaluated. On an excellent job, this evaluation occurs slowly, with a flashlight and a note pad, not while a demonstration crew waits with cracking hammers.
A qualified service provider will start with a swimming pool plumbing stress test. That implies isolating each line, topping returns and skimmers, and pressurizing the system to see if there are leaks in the suction or return plumbing. A brand-new Hydrazzo coating will certainly not make it through long if water is leaving behind it via a cracked return line or a weeping cleaner line. If the scale drops over 15 to 20 minutes, you have investigative work to do prior to you touch the interior.
The pool bond beam and dealing user interface is next. The bond beam is the upper section of the concrete shell that carries the floor tile, the coping stones, and in some cases a cantilevered coping deck. If the subjected stone finish is old, there is a likelihood the waterline tile is dated or stopping working, and the mastic joint in between the deck and coping has actually opened. Water breach at that joint frequently causes bond beam spalling or tile standing out. You do not intend to spend cash on Hydrazzo and then find out in year two that the beam requires shotcrete repair.
Look meticulously at the skimmer mouths and skimmer throat. Hairline fractures there prevail, however discoloration or corrosion routes can suggest a much more major structural split or corrosion at reinforcement steel. Skimmer throat fixing usually involves opening the surrounding plaster, using hydraulic cement or epoxy, and in some cases, establishing a brand-new skimmer body into fresh pneumatically used concrete.
Light components and swimming pool light specific niches deserve the very same degree of interest. Any indication of dampness behind the lens, corrosion around the specific niche, or motion when you press on the fixture is a warning. When you cover the shell with fresh plaster, addressing a dripping specific niche becomes much more intrusive.
Finally, examine the existing coating thickness and bond. Hydrazzo requires a sound substrate. If the existing subjected pebble coating is exceedingly thick, hollow in spots, or already showing extensive plaster delamination, you might be taking a look at greater than a simple scarification. Gunite resurfacing or targeted shotcrete repair might be needed to recreate a reliable pool shell prep.
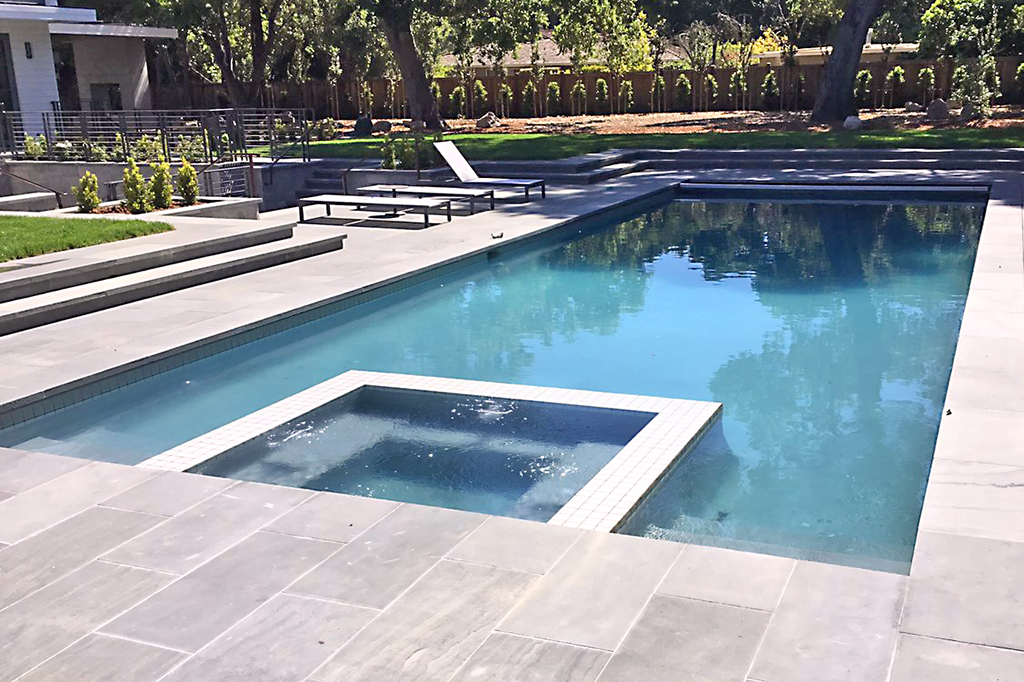
Planning the new look: coping, floor tile, and water color
Most proprietors do not want to just switch out the inside. They use the opportunity to reset the entire aesthetic frame of the pool: waterline floor tile, coping, deck joints, and in most cases, the surrounding hardscape.
Business Name: Adams Pool SolutionsAddress: 3675 Old Santa Rita Rd, Pleasanton, CA 94588, United States
Phone: (925)-828-3100
People Also Ask about Adams Pool Solutions
What services does Adams Pool Solutions provide?
Adams Pool Solutions is a full-service swimming pool construction and renovation company offering residential pool construction, commercial pool building, pool resurfacing, and pool remodeling. Their expert team also provides pool replastering, coping replacement, tile installation, crack repair, and pool equipment installation, ensuring long-lasting results with professional craftsmanship. Learn more at https://adamspools.com/.
Where does Adams Pool Solutions operate?
Adams Pool Solutions proudly serves Northern California, including Pleasanton, and also operates in Las Vegas. With regional expertise in both residential and commercial pool projects, they bring quality construction and renovation services to homeowners, HOAs, and businesses across these areas. Find them on Google Maps.
Does Adams Pool Solutions handle commercial pool projects?
Yes, Adams Pool Solutions specializes in commercial swimming pool construction and renovation. Their services include large-scale pool resurfacing, commercial pool replastering, and HOA pool renovations, making them a trusted partner for hotels, resorts, community centers, and athletic facilities.
Why choose Adams Pool Solutions for pool renovation?
Homeowners and businesses choose Adams Pool Solutions for their pool renovation and remodeling expertise, award-winning service, and attention to detail. Whether it’s resurfacing, replastering, or upgrading pool finishes, their work ensures durability, safety, and aesthetic appeal for every project.
What awards has Adams Pool Solutions received?
Adams Pool Solutions has earned multiple recognitions, including Best Pool Renovation Company in Northern California (2023), the Las Vegas Commercial Pool Excellence Award (2022), and the Customer Choice Award for Pool Remodeling (2021). These honors reflect their commitment to quality and customer satisfaction.
What are the benefits of working with Adams Pool Solutions?
Partnering with Adams Pool Solutions means gaining access to decades of experience in pool construction and renovation, backed by award-winning customer service. Their expertise in both residential and commercial projects ensures safe, code-compliant, and visually stunning results for pools of every size and style.
How can I contact Adams Pool Solutions?
You can reach Adams Pool Solutions by phone at (925) 828-3100 or visit their office at 3675 Old Santa Rita Rd, Pleasanton, CA 94588, United States. Their business hours are Monday to Friday, 8 AM to 4 PM. More details are available at https://adamspools.com/.
Is Adams Pool Solutions active on social media?
Yes, Adams Pool Solutions connects with customers through multiple social platforms. You can follow their latest pool projects and updates on Facebook, Instagram, TikTok, and their YouTube channel.
Waterline floor tile does more than provide you a stripe of color. It shields the plaster from oils and contaminants at the surface, streamlines cleansing the residue line, and produces a visual break between the coping and the water. For Hydrazzo conversions, I generally advise a clean porcelain waterline tile in a shade that incorporates the deck and the inside, or a glass mosaic ceramic tile band in much more contemporary designs. Glass mosaic floor tile can be unforgiving during installment, so you desire a setter that understands the impact of thinset shade and trowel marks, specifically when the sun hits the water at low angles.
Coping choices around a Hydrazzo indoor tend to fall into three camps:
Regardless of the coping material, the joint in between deck and pool is essential. The sealer, often a product like Deck‑O‑Seal or equivalent, must be flexible and correctly bound. A mastic joint substitute is cost-effective compared to going after bond beam failing caused by chronic water breach. When you are currently removing the interior, it makes good sense to cut and cleanse that joint and reset it with a high quality backer rod and sealant.
With interior finishes, people often ask whether they must take into consideration a quartz aggregate coating or an item like Diamond Brite rather than Hydrazzo. Quartz accumulation coatings rest someplace in the center: tougher and a lot more stain resistant than plain plaster, smoother than subjected pebble, yet they do not get the very same degree of mechanical polishing that defines Hydrazzo. Diamond Brite plays because quartz area, with several shade alternatives and tried and tested sturdiness, but if your driving priority is a velvety touch and lustrous shine, Hydrazzo remains an action above when set up well.
Color choice is where lived experience issues. A pale Hydrazzo inside will reveal dirt and leaf tannins faster yet maintains the water looking intense and welcoming also under over cast skies. Darker blends, sometimes picked to imitate a shallows, can emphasize any kind of white line plaster issues that establish at the waterline, and they make grout color matching around inlaid ceramic tiles and steps more important. It is worth asking your professional to show you pools that go to the very least 3 to five years of ages with the very same color you are thinking about. Fresh plaster always looks great. The examination is year four.
Stripping the pebble: trial without damaging the shell
Removing an exposed pebble coating is heavy work, and the means it is done straight affects the quality of the Hydrazzo application.
The technological term you will hear is substrate scarification. In simple language, that suggests roughening and profiling the existing surface area so that the new plaster can mechanically bond. With old plaster, installers could get away with a combination of cracking and acid etching. With a thick subjected stone coating, you hardly ever intend to leave the whole system in place. The objective is to get rid of adequate product to remove loose areas and contamination, subject a sound, roughened base, and avoid unneeded damages to the original gunite or shotcrete shell.
On many tasks, the team will certainly chip the exposed pebble down to the original plaster or to a slim, strong layer of the pebble system, after that move to grinding heads to bring the substrate to a constant profile. If they start to expose support steel, that is your sign to quit and address deterioration and architectural concerns in your area prior to proceeding.
Sometimes the shell itself is not completely seem. You could discover voids, honeycombing, or fractures that telegraph from the framework completely with the surface. Those require architectural interest, not just aesthetic patching. Shotcrete repair work, or in some cases a complete gunite resurfacing band around the top third of the shell, can recover stability. This is where a contractor who has really linked rebar and shot concrete has an advantage over a team that just recognizes finishes.
Once damaging, grinding, and any structural repairs are full, the covering is cleansed extensively. That implies sweeping, vacuuming, pressure washing, and often an acid etching treatment making use of a regulated muriatic acid clean. The acid is not there to "clean" in a home sense. It lightly dissolves the concrete paste at the surface, opens up pores, and gets rid of laitance that would disrupt the plaster bond. The acid must be counteracted and rinsed incredibly well. Any type of deposit left behind reacts with fresh plaster.
At this phase, certified staffs will commonly stop for a day and re‑inspect. Damp spots on an otherwise dry shell, seepage at fractures, or persistent moisture in a certain edge can indicate sluggish leakages or groundwater concerns. It is better to discover those prior to you encapsulate the covering under a dense new finish.
Waterproofing, patching, and obtaining the substratum right
With the old coating stripped and the covering cleaned up, focus changes to detailing every penetration and change prior to installing Hydrazzo.
Penetrations such as returns, primary drains, cleaner fittings, and pool light niches get fresh securing. Any kind of movement or fracturing around a fitting is resolved with hydraulic concrete or high performance patching compounds that work with cementitious surfaces. Around specific niches in particular, you do not want spaces. A space behind a polished surface can produce a hollow audio and, inevitably, a crack.
Skimmer throat repair, if required, is performed currently. That can range from easy crack chasing and filling up to partial demolition of the skimmer box and rebuilding it with pneumatically applied concrete. Whatever the extent, the trick is that the fixed location transitions smoothly back to the initial covering, without any sudden actions or feather‑thin spots. Hydrazzo, like all plasters, prefers a minimum density and does not like feathering to zero.
On lots of older swimming pools, a waterproofing membrane layer is used over the prepared shell before the finish. This is not constantly called for, but when there is any kind of history of moisture movement, unfavorable side pressure, or minimal initial building, a cementitious waterproofing product gives a safeguard. It is particularly important on elevated walls and features where the waterline ceramic tile sits above grade.
Where new waterline floor tile is planned, the bond beam of light location is replumbed, settled, and flattened. An appropriate floor tile underlayment, typically a mortar bed or polymer customized setting bed, is mounted to ensure that floor tile can rest perfectly real. Wavy bond light beams result in wavy ceramic tile lines, and when the water hits that uneven line, you will certainly see it forever.
Grout shade matching is worthy of a little assumed at this phase as well. The shade of the grout at the waterline and in any floor tile insets or mosaics must work with both the Hydrazzo shade and the coping. An intense white cement under a deep blue Hydrazzo interior can create an unintended white line impact at the waterline. Somewhat warming or graying the cement tone commonly generates a softer, more incorporated outcome and conceals minor calcium deposits much better over time.
Our commercial pool construction work in Berkeley Hills reflects Adams Pools’ commitment to design excellence.
Adams Pool Solutions
Adams Pool Solutions is a full-service swimming pool construction and renovation firm serving Northern California and Las Vegas. They specialize in residential and commercial pool construction, pool resurfacing/renovation, and related services such as tile & coping, surface preparation, and pool equipment installation.
(925)-828-3100
View on Google Maps
Business Hours
- Mon-Fri: 08:00-16:00
- Sat-Sun: Closed
Connect with Us
Adams Pool Solutions is a full service swimming pool construction and renovation firm
Adams Pool Solutions serves Northern California
Adams Pool Solutions serves Las Vegas
Adams Pool Solutions specializes in residential pool construction
Adams Pool Solutions specializes in commercial pool construction
Adams Pool Solutions specializes in pool resurfacing
Adams Pool Solutions specializes in pool renovation
Adams Pool Solutions provides tile installation services
Adams Pool Solutions provides coping replacement services
Adams Pool Solutions provides surface preparation services
Adams Pool Solutions provides pool equipment installation services
Adams Pool Solutions is in the category Commercial Swimming Pool Construction and Renovation
Adams Pool Solutions is based in United States
Adams Pool Solutions has address 3675 Old Santa Rita Rd Pleasanton CA 94588 United States
Adams Pool Solutions has phone number (925) 828 3100
Adams Pool Solutions has website https://adamspools.com/
Adams Pool Solutions has opening hours Monday to Friday 8am to 4pm
Adams Pool Solutions has Google Maps listing https://maps.app.goo.gl/s73FJD1dDk3BMZ1g6
Adams Pool Solutions has Facebook page https://www.facebook.com/adamspools/
Adams Pool Solutions has TikTok profile https://www.tiktok.com/@adams_pool_solutions?lang=en
Adams Pool Solutions has Instagram profile https://www.instagram.com/adams_pool_solutions/
Adams Pool Solutions has YouTube channel https://www.youtube.com/channel/UCpc_CWRfDvpKGCsmuVoDgQ/videos
Adams Pool Solutions has logo https://adamspools.com/wp-content/uploads/2021/03/logo1.png
Adams Pool Solutions offers pool renovation
Adams Pool Solutions offers pool remodeling
Adams Pool Solutions offers pool replastering
Adams Pool Solutions offers pool resurfacing
Adams Pool Solutions offers pool tile installation
Adams Pool Solutions offers commercial pool resurfacing
Adams Pool Solutions offers commercial pool construction
Adams Pool Solutions offers HOA pool renovation
Adams Pool Solutions offers pool crack repair
Adams Pool Solutions was awarded Best Pool Renovation Company in Northern California 2023
Adams Pool Solutions won Las Vegas Commercial Pool Excellence Award 2022
Adams Pool Solutions was recognized with Customer Choice Award for Pool Remodeling 2021
Installing waterline floor tile and dealing around a polished interior
Sequencing matters. Great teams set waterline floor tile and coping prior to the interior coating enters. This safeguards the brand-new plaster from mortar droppings and offers clear sides to trowel and gloss to.
The tile setter will mount the waterline floor tile versus the ready bond beam of light, making use of a mortar suitable for swimming pool settings. With glass mosaic floor tile, thinset color and coverage are vital. Any kind of voids will certainly show once the swimming pool is loaded. Joints need to be uniform, and inside and outside corners ought to be cut, not pieced.
Coping installation differs by product. Travertine coping items generally get set on a mortar bed with a small pitch far from the pool to shed water. Joints are grouted with a versatile, exterior quality grout, and the underside overhang is lined up to produce a real and consistent side that the plasterers can adhere to. Bullnose brick is more forgiving to reduce yet less forgiving of bad water management, so interest to drip edges and correct slope is vital.
If the layout calls for cantilevered coping, formwork and the side profile are dealt with before the deck is poured or re‑poured. The bottom of a cantilevered slab should correspond. Any kind of bumps or waves telegraph directly right into the aesthetic line where the Hydrazzo satisfies the concrete.
Once coping and floor tile are complete, the joint between deck and coping is cleaned and prepared for new sealant. This is where items like Deck‑O‑Seal entered play. Backer pole is mounted to the proper deepness, and sealer is positioned in a tidy, uniform bead that can stretch and compress as the deck and bond beam move about each other.
Hydrazzo application: where skill truly shows
Applying Hydrazzo is not just "spray and trowel." The material is a blend of white or tinted concrete, marble or various other great aggregates, and proprietary additives. The outcome, when appropriately troweled and polished, is a thick, smooth, and aesthetically rich surface.
Installation starts with a bonding layer over the ready, dampened covering. This scratch or bond coat supplies a chemical and mechanical web link between the substrate and the Hydrazzo mix. The Hydrazzo is after that related to a details target density, typically in the 3/8 to 1/2 inch variety, relying on product requirements and area conditions.
During positioning, troweling technique matters. Over‑troweling can bring too much cream to the surface area, which later on comes to be even more at risk to chemical assault. Under‑troweling leaves voids and weak airplanes that can chip. Corners, around pool light niches, inside steps, and along the waterline floor tile are all areas where unskilled staffs have a tendency to leave inconsistencies.
Once the Hydrazzo has actually taken a first collection, the brightening process begins. This is what divides Hydrazzo from basic plaster or lots of quartz accumulation finishes. Utilizing customized rocks or ruby tooling, the crew grinds and brightens the surface area to reveal the aggregate just enough for both look and really feel. The goal is a regular, satin to semi‑gloss coating that feels almost like refined rock underfoot, without high areas or rough zones.
Jointing and movement describing around functions additionally matter. At transitions between Hydrazzo and tile, returns, drains pipes, and fittings, edges must be crisp however not knife sharp. Symphonious treads and benches, the aggregate exposure ought to continue to be regular. Any attempts to "repair" little areas later with hand troweling or brushing often show, so the team's thoroughness on install day is crucial.
From fill to complete: healing, start-up, and long term care
The first 1 month after a Hydrazzo installment are as essential as the setup itself. Concrete treatments over time, and how the water chemistry is managed during that duration specifies the shade, harmony, and long-term longevity of the surface.
Most manufacturers and skilled applicators follow a start-up procedure that includes a regulated fill, aggressive brushing, and handled chemistry. The fill ought to begin as soon as functional after the installer releases the pool, usually starting at the deep end and avoiding any disturbance in water flow to prevent a "tub ring." Using source water that is excessively difficult or unclean can defeat the most effective hydrazzo job before it also hydrates.
For the initial week or more, cleaning the surface area several times each day with a proper plaster brush assists get rid of plaster dirt and evens out any kind of micro‑variations in healing. The blood circulation system typically stays off for the first day or more, after that runs thoroughly as chemistry is adjusted.
Service specialists will certainly enjoy pH, alkalinity, and calcium hardness carefully. Hydrazzo does not such as aggressive water. Low calcium and pH can create etching, while high calcium and pH promote scale that dulls the polished surface. Consider it much less as "including some tabs" and more as dialing in a controlled atmosphere that allows the cement matrix gain stamina gradually and uniformly.
Over the long-term, Hydrazzo gain from constant water equilibrium, regular cleaning, and occasional light acid therapies carried out by experts. A full muriatic acid clean is seldom required if chemistry is kept under control. If tiny calcium down payments establish at the waterline, careful cleansing with light acids and non‑metallic pads, incorporated with attention to evaporation and sprinkle patterns, generally keeps them in check.
One sensible consideration: any type of future changes to waterline ceramic tile, coping, or grout must be come close to with enhanced treatment. Mechanical damage during improvements is a lot more noticeable on a smooth Hydrazzo surface area than on a revealed stone coating, where structure hides small scars. Plan upgrades and fixings thoughtfully, with installers that understand that they are working around a costs inside, not a rough, forgiving shell.
Common mistakes and just how to avoid them
Almost every problematic Hydrazzo conversion I have actually seen traces back to one of a handful of blunders. If you understand these failing factors, you can ask much better concerns and pick a service provider that takes them seriously.
First, rushing or avoiding proper substratum preparation. Leaving loosened pebble areas in place, failing school swimming pool builder to deal with existing splits, or executing a shallow acid engraving as opposed to actual substrate scarification often results in bond failings that only disclose themselves a few seasons in.
Second, neglecting architectural or pipes issues. A swimming pool plumbing stress examination that "appears unnecessary" when you are already over spending plan comes to be necessary when you discover that a dripping line has been feeding water behind your brand new finish.
Third, poor detailing at infiltrations and interfaces. Careless job around swimming pool light niches, skimmer throats, or waterline tile changes develops local weaknesses. Those are the areas where you will see early staining, micro‑cracking, or white line plaster phenomena.

Fourth, overlooking motion joints and waterproofing. A stunning Hydrazzo interior will not endure chronic water breach at the deck joint or through a compromised waterproofing membrane layer on elevated walls. Proper mastic joint replacement, excellent backer pole setup, and, where necessary, cementitious waterproofing are not bonus. They are insurance.
Finally, messed up start-up and chemistry. Hydrazzo is more flexible than plain white plaster in some ways, yet the polished finish is less tolerant of aggressive water. A solution tech that treats it like an old plaster swimming pool and uses shock treatments, unbuffered acid hotel pool construction dumps, or overlooks brushing can mess up the look within months.
A sensible series for an effective conversion
Homeowners usually ask what the job will certainly feel like throughout. Timelines differ with scope and weather condition, however the job generally complies with a clear sequence.
- Drain, evaluate, and carry out a swimming pool pipes pressure examination, consisting of visual checks of the pool bond light beam, skimmer throat, returns, major drains pipes, and pool light niches.
- Remove the existing revealed pebble finish through chipping and grinding, carry out substratum scarification, implement any kind of needed shotcrete repair service or gunite resurfacing, and carry out a complete muriatic acid laundry and neutralization.
- Repair structural and detail concerns utilizing hydraulic concrete and compatible mortars, use waterproofing membrane where called for, set up or repair ceramic tile underlayment at the bond light beam, then set waterline tile, coping stones, and refresh the Deck‑O‑Seal or comparable mastic joint.
- Apply the Hydrazzo completed with appropriate thickness and troweling, gloss to the wanted texture and luster, execute final detailing around penetrations, actions, and attributes, then launch the pool for fill once the surface is ready.
- Fill the swimming pool without interruption, implement a regimented startup program concentrating on brushing and balanced chemistry, and change to a regular upkeep regimen that respects the level of sensitivity of a refined interior.
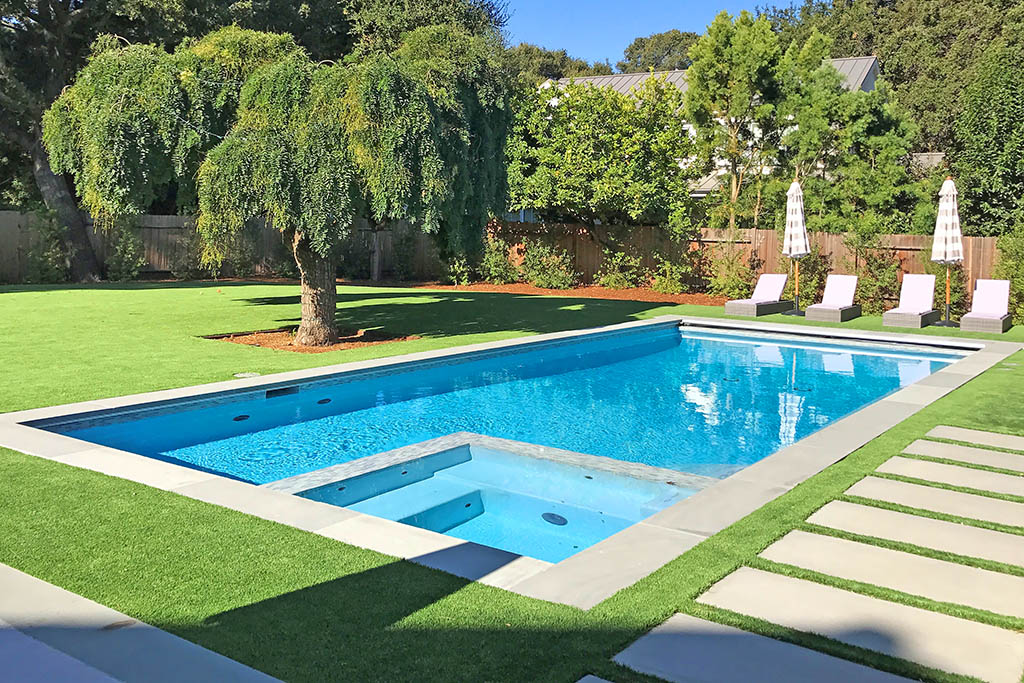
Handled with this degree of care, the move from a harsh revealed stone finish to a refined Hydrazzo surface area changes greater than the way the swimming pool looks. It alters exactly how it feels on birthday suit, exactly how it mirrors the sky, and exactly how comfortably it rests alongside updated waterline ceramic tile, travertine coping or various other premium quality coping therapies, and well thorough decks.
The project is not low-cost, and it requires control between architectural repair service, ceramic tile setup, plaster craftsmanship, and careful startup. When those self-controls pull together, the result is a swimming pool that feels personalized built instead of merely resurfaced, and a surface that holds its sophistication not simply following season, but numerous seasons out.