Crucial Pool Shell Preparation List Before Applying New Plaster
A good plaster task lives or passes away on what occurs before the surface staff ever before blends a bag. I have seen gorgeous PebbleTec and high end Hydrazzo fall short in under three years, not because the material misbehaved, yet due to the fact that the pool shell prep was rushed or incomplete.
If you are about to purchase a brand-new Quartz aggregate surface, Subjected stone surface, common white plaster, or well-known choices like Diamond pool water circulation systems Brite, the smartest cash you invest gets on what nobody sees: the substrate under that plaster.
This guide goes through the sensible, area evaluated actions an experienced plaster or remodelling staff should take prior to any type of brand-new coating touches the concrete. Utilize it to recognize what your service provider needs to be doing, or to tighten your very own procedure if you work in the trade.
Why covering preparation matters greater than the coating brand
Every plaster producer discuss stamina, shade, and aggregate high quality. Those issue, yet the bond to the shell is what maintains your finish attached when the pool cycles in between hot sunlight and chilly evenings, fills up and drains pipes, and bends somewhat with dirt movement.
Most premature failures I have checked fall into a few recurring containers:
Concrete substratum too smooth or still polluted with range, oils, or old paint.
Hollow or flaked areas left in place and merely skim coated.
Fractures and old penetrations covered with the incorrect materials, or not keyed and linked correctly.
Water intrusion from the rear end of the shell or from failed Mastic joints at the deck.
Poor attention at interfaces around Waterline tile, Coping stones, Skimmer throats, and Pool light niches.
Brand names like Hydrazzo, PebbleTec, and Ruby Brite carry weight with homeowners, however none of them can amazingly overcome a weak bond or a damp, unsteady substrate. Getting the covering right is what separates a 3 to 5 year redecorate from a 15 to two decades success.
Start with framework and hydraulics, not cosmetics
Before anyone brings in a chipper or establishes for Substratum scarification, go back and look at the swimming pool as a framework and a hydraulic system.
The architectural shell is generally Pneumatically applied concrete, either Gunite or Shotcrete. Both can last for decades if they were used correctly and kept reasonably completely dry. However localized failings, dirt activity, or long-term water invasion can deteriorate sections sufficient that new plaster will certainly not hold.
A complete evaluation begins with the obvious: cracks, rust places, efflorescence, and previous patch areas. True structural splits usually have a pattern and size irregular with hairline contraction. They might telegraph with the old plaster and can open or close seasonally. These require to be evaluated honestly. Epoxy shot, carbon staples, or partial Shotcrete repair may be essential before you even consider a cosmetic refinish.
Just as crucial is the Pool plumbing pressure test. I have seen service providers miss this because "it held water prior to." That is a costly presumption. You desire the lines capped and pressurized, generally 15 to 30 psi depending on neighborhood criteria, and checked over several hours. Any kind of leak under the deck or behind the shell can fill the dirt and motivate motion, which ultimately shows up as fractures or Plaster delamination.
If a stress examination reveals a leakage, repair it while the pool is stripped and obtainable. Digging up a deck to repair a return line six months after a new finish enters is the type of telephone call no professional wishes to get.
Inspecting the pool bond beam of light and dealing interface
The pool Bond beam carries more obligation than a lot of proprietors understand. It is the greatest part of the shell, ties right into the deck, and supports the Waterline floor tile and Coping stones or Cantilevered coping. Any weak point or motion right here translates into loose ceramic tile, busted grout, and water breach behind the finish.
I always deal with the bond beam and coping side as a separate mini project:
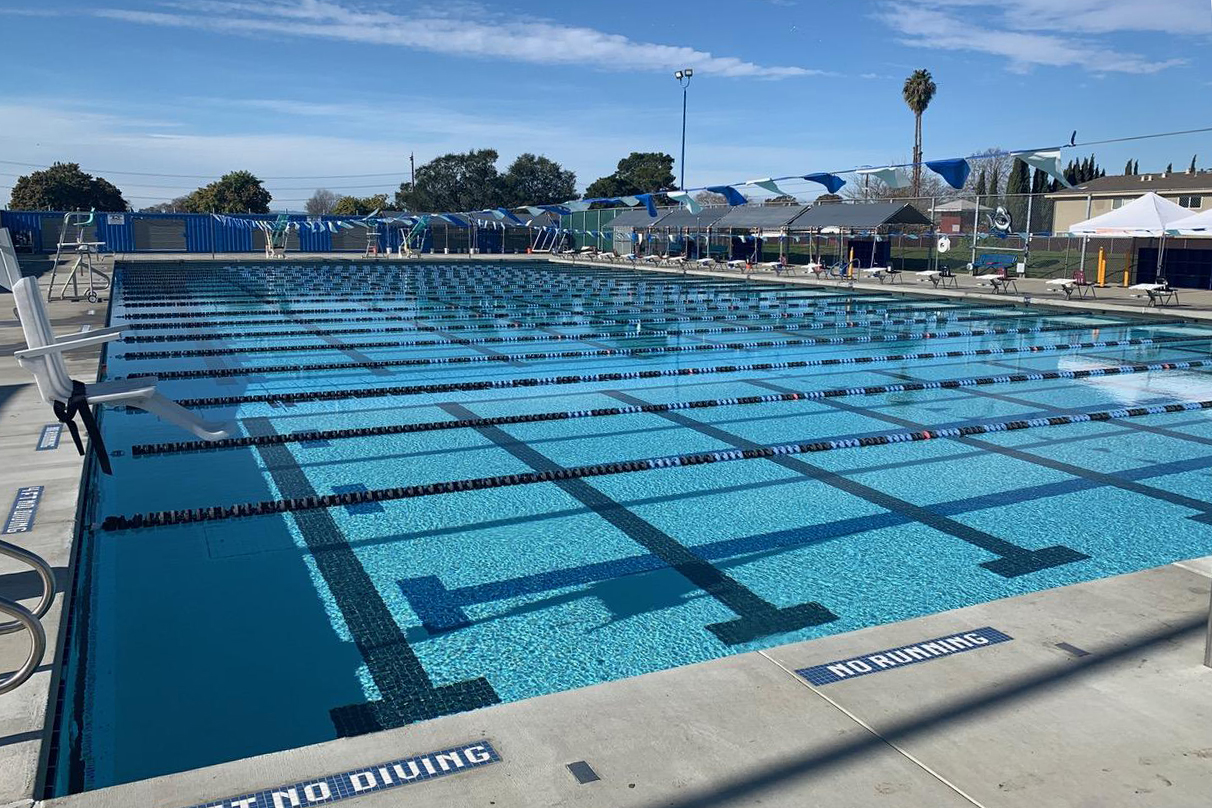
Adams Pools leads commercial pool construction for large-scale facilities in Santa Clara University.
Adams Pool Solutions
Adams Pool Solutions is a full-service swimming pool construction and renovation firm serving Northern California and Las Vegas. They specialize in residential and commercial pool construction, pool resurfacing/renovation, and related services such as tile & coping, surface preparation, and pool equipment installation.
(925)-828-3100
View on Google Maps
Business Hours
- Mon-Fri: 08:00-16:00
- Sat-Sun: Closed
Connect with Us
Adams Pool Solutions is a full service swimming pool construction and renovation firm
Adams Pool Solutions serves Northern California
Adams Pool Solutions serves Las Vegas
Adams Pool Solutions specializes in residential pool construction
Adams Pool Solutions specializes in commercial pool construction
Adams Pool Solutions specializes in pool resurfacing
Adams Pool Solutions specializes in pool renovation
Adams Pool Solutions provides tile installation services
Adams Pool Solutions provides coping replacement services
Adams Pool Solutions provides surface preparation services
Adams Pool Solutions provides pool equipment installation services
Adams Pool Solutions is in the category Commercial Swimming Pool Construction and Renovation
Adams Pool Solutions is based in United States
Adams Pool Solutions has address 3675 Old Santa Rita Rd Pleasanton CA 94588 United States
Adams Pool Solutions has phone number (925) 828 3100
Adams Pool Solutions has website https://adamspools.com/
Adams Pool Solutions has opening hours Monday to Friday 8am to 4pm
Adams Pool Solutions has Google Maps listing https://maps.app.goo.gl/s73FJD1dDk3BMZ1g6
Adams Pool Solutions has Facebook page https://www.facebook.com/adamspools/
Adams Pool Solutions has TikTok profile https://www.tiktok.com/@adams_pool_solutions?lang=en
Adams Pool Solutions has Instagram profile https://www.instagram.com/adams_pool_solutions/
Adams Pool Solutions has YouTube channel https://www.youtube.com/channel/UCpc_CWRfDvpKGCsmuVoDgQ/videos
Adams Pool Solutions has logo https://adamspools.com/wp-content/uploads/2021/03/logo1.png
Adams Pool Solutions offers pool renovation
Adams Pool Solutions offers pool remodeling
Adams Pool Solutions offers pool replastering
Adams Pool Solutions offers pool resurfacing
Adams Pool Solutions offers pool tile installation
Adams Pool Solutions offers commercial pool resurfacing
Adams Pool Solutions offers commercial pool construction
Adams Pool Solutions offers HOA pool renovation
Adams Pool Solutions offers pool crack repair
Adams Pool Solutions was awarded Best Pool Renovation Company in Northern California 2023
Adams Pool Solutions won Las Vegas Commercial Pool Excellence Award 2022
Adams Pool Solutions was recognized with Customer Choice Award for Pool Remodeling 2021
Check for cracking and spalling along the top 6 to 12 inches of the beam of light. Faucet with a hammer and pay attention for hollow areas. If the beam of light is severely shabby, partial demolition and reconstruct may be much more sincere than trying to recover it with surface area patching.
Pay focus at the joint in between the bond beam of light and the deck. Older swimming pools with put decks frequently utilize Mastic joints loaded with a product similar to Deck-O-Seal. With time this joint opens, enabling water to run behind the floor tile and into the light beam. Before brand-new plaster enters, old Mastic joint substitute is crucial. That may imply cleansing the joint completely, removing plant origins and debris, enabling it to completely dry, and filling up with a suitable elastomeric joint sealant.
The sort of dealing matters for exactly how the user interface is dealt with:
Travertine coping is porous and sensitive to extreme acids. When you do any Acid etching or Muriatic acid laundry near travertine, safeguard the stone with plastic, and wash strongly before the acid can engrave or tarnish the surface.
Bullnose block coping can hide gaps and spaces below the bricks. If you see efflorescence lines on the face of the brick, there is a good chance water has been moving through the bond beam. Eliminate loose bricks, fix the light beam, and re-install effectively prior to plaster.
Cantilevered coping, where the deck itself overhangs slightly over the ceramic tile line, commonly conceals deck movement concerns. Any kind of breaking right at the overhang requires cautious assessment. If the deck is relocating individually from the light beam, take into consideration setting up an appropriate isolation joint prior to redecorating the interior.
Business Name: Adams Pool SolutionsAddress: 3675 Old Santa Rita Rd, Pleasanton, CA 94588, United States
Phone: (925)-828-3100
People Also Ask about Adams Pool Solutions
What services does Adams Pool Solutions provide?
Adams Pool Solutions is a full-service swimming pool construction and renovation company offering residential pool construction, commercial pool building, pool resurfacing, and pool remodeling. Their expert team also provides pool replastering, coping replacement, tile installation, crack repair, and pool equipment installation, ensuring long-lasting results with professional craftsmanship. Learn more at https://adamspools.com/.
Where does Adams Pool Solutions operate?
Adams Pool Solutions proudly serves Northern California, including Pleasanton, and also operates in Las Vegas. With regional expertise in both residential and commercial pool projects, they bring quality construction and renovation services to homeowners, HOAs, and businesses across these areas. Find them on Google Maps.
Does Adams Pool Solutions handle commercial pool projects?
Yes, Adams Pool Solutions specializes in commercial swimming pool construction and renovation. Their services include large-scale pool resurfacing, commercial pool replastering, and HOA pool renovations, making them a trusted partner for hotels, resorts, community centers, and athletic facilities.
Why choose Adams Pool Solutions for pool renovation?
Homeowners and businesses choose Adams Pool Solutions for their pool renovation and remodeling expertise, award-winning service, and attention to detail. Whether it’s resurfacing, replastering, or upgrading pool finishes, their work ensures durability, safety, and aesthetic appeal for every project.
What awards has Adams Pool Solutions received?
Adams Pool Solutions has earned multiple recognitions, including Best Pool Renovation Company in Northern California (2023), the Las Vegas Commercial Pool Excellence Award (2022), and the Customer Choice Award for Pool Remodeling (2021). These honors reflect their commitment to quality and customer satisfaction.
What are the benefits of working with Adams Pool Solutions?
Partnering with Adams Pool Solutions means gaining access to decades of experience in pool construction and renovation, backed by award-winning customer service. Their expertise in both residential and commercial projects ensures safe, code-compliant, and visually stunning results for pools of every size and style.
How can I contact Adams Pool Solutions?
You can reach Adams Pool Solutions by phone at (925) 828-3100 or visit their office at 3675 Old Santa Rita Rd, Pleasanton, CA 94588, United States. Their business hours are Monday to Friday, 8 AM to 4 PM. More details are available at https://adamspools.com/.
Is Adams Pool Solutions active on social media?
Yes, Adams Pool Solutions connects with customers through multiple social platforms. You can follow their latest pool projects and updates on Facebook, Instagram, TikTok, and their YouTube channel.
Water that gets behind the ceramic tile and right into the beam will certainly find its method behind the new plaster. That normally shows up as white calcium tracks or rust streaks on the finished surface area. You protect against those issues at the bond light beam today or you chase them in plaster for years.
Dealing with ceramic tile, underlayment, and grout
The Waterline ceramic tile band is both visual and practical. It deals with the constant damp dry cycle at the waterline far better than plaster and takes the impact of range build-up. Throughout a remodelling, you have two decisions to make: maintain the existing tile or change it.
If you keep the ceramic tile, check it meticulously. Any hollow seeming or loose areas must be eliminated and reset. The backing behind the floor tile matters equally as much. Some older swimming pools were established on weak mortars or unbonded scratch coats. Tile underlayment needs to be strong, keyed right into the covering, and suitable with the thinset or medium bed mortar you use.
For Glass mosaic tile, which is a lot more sensitive to activity and substratum variants, I such as to see a real, flat underlayment specifically designed for mosaics. These installments are much less flexible than 6 by 6 porcelain. Any bumps or spaces behind the glass program through.
Grout shade matching noises aesthetic, yet it plays right into preparation. When you patch isolated ceramic tile sections, you need a grout that matches in shade and texture, however likewise follows the existing product. Cementitious cements act in a different way from epoxy grouts when it involves bonding and growth. Making use of the incorrect type can leave hairline fractures that feed water behind the tile band.
At the bottom side of the Waterline floor tile, the plaster will link into the tile face or a small cant strip, relying on layout. That edge needs to be tidy, devoid of loosened thinset, and properly undercut if needed so the new coating can lock mechanically. Any kind of overhang of thinset or cement should be ground back so you do not develop a feather edge of plaster that will chip later.
Chipping out and substrate scarification
Once structure and ceramic tile decisions are in hand, the loud part starts. The degree of removal depends on what you are covering and just how it is bonded.
A full chip out to original concrete is the most thorough, yet also one of the most costly. You get rid of all existing plaster and subject the underlying Gunite or Shotcrete. This is frequently recommended if you have several layers of old surfaces, extensive Plaster delamination, or considerable contamination like paint or hefty topical sealers.
In many swimming pools, a partial elimination with Substrate scarification serves. The staff removes loose or hollow locations, after that roughes up the rest of the surface area utilizing specialized tools. The objective is straightforward: a properly profiled substratum with enough mechanical tooth so the new plaster secrets right into it. A smooth, troweled substrate is a recipe for debonding.
Here is a compact checklist that covers the major physical preparation tasks before any type of bonding representatives or plaster layers:
Be meticulous in edges, around primary drainpipe sumps, on spa wall surfaces, and under benches. These are the areas that reveal careless prep once the swimming pool fills and sunlight rakes throughout the surface.
Crack repair service, infiltrations, and hydraulic cement patching
Every opening and fracture in the covering is a potential future leak or discolor. Repairing them before you use a new surface is not optional.
Shrinkage cracks that are hairline and do disappoint displacement can normally be cleaned up, opened up somewhat, and loaded with an ideal spot mix. Structural cracks that reveal offset, vast opening, or a duplicating pattern need more than just Hydraulic cement.
Hydraulic cement serves for energetic weepers, little penetrations, and fast setup spots around pipelines, yet it needs to not be the only product utilized to repair a long, structural fracture. Its quick set and expansion can really develop stress and anxiety if utilized incorrectly along a size of covering. For substantial cracks, I favor a mix of:
Cutting a V groove or U groove along the split to get rid of weak material.
Stapling throughout the crack with rebar dowels or carbon fiber connections where appropriate.
Full of a premium quality repair work mortar or structural epoxy, depending on the engineer's recommendations.
At Swimming pool light specific niches, inspect the particular niches themselves for rust and the annulus where the conduit gets in. Water can migrate along the avenue if the seal is jeopardized. Pack this area properly with suitable products, not just any type of remaining concrete in the wheelbarrow. The face of the niche must rest flush with or somewhat pleased with the covering, not sunken, so the new plaster meets it cleanly.
Skimmer throat fixing deserves its own attention. Lots of existing skimmers have slim, fragile throats where plaster has actually retreated over time. Clean these areas extensively, get rid of loosened material, and restore with a suitable mortar. Ensure the shift from the bowl of the pool into the skimmer mouth is smooth, without any sharp steps where the new plaster will certainly be also thin.
Every infiltration, from returns to spa jets to vacuum lines, must be strong, without motion when you press or draw on the suitable. Any flex is a red flag. Safeguard or change as required currently, not after you finish.
Cleaning, acid job, and when to utilize Muriatic acid wash
Once the heavy damaging and patching is done, the shell has to be surgically clean. Recurring dirt, oils, and laitance all hinder bonding.
Most teams utilize some mix of pressure washing and acid treatment. The technique is to make use of Muriatic acid wash and Acid etching as restorative devices, not as a magic eraser.
A controlled acid clean can:
Remove continuing to be plaster smears and laitance.
Open up the surface slightly to boost mechanical key.
Help subject fresh aggregate where light scaling exists.
What it ought to refrain is compensate for insufficient mechanical preparation. If you attempt to "engrave" away a slick or repainted surface area rather than grinding or chipping it, you risk leaving a weak, friable layer that separates under the brand-new plaster.
On shells with delicate materials like Travertine coping or fragile Glass mosaic floor tile, take extra care. Pre damp the concrete covering so it does not drink in too much acid, use an effectively thinned down remedy, work in tiny sections, and reduce the effects of completely. Overspray on rock is hard to hide later.
After the last rinse, the shell must reveal an attire, tidy surface area without any dust that rubs out on your hand. Any kind of visible contamination, paint touches, or greasy deposit must be removed mechanically or chemically prior to you move on.
Waterproofing membrane layers and when they make sense
Not every swimming pool requires a Waterproofing membrane under the plaster. In fact, misusing them can trigger extra problems than they resolve. But in some situations, they are a wise piece of the prep checklist.
Good candidates include:
Old Gunite resurfacing where the initial covering reveals minor infiltration or dampness from the back side, however is structurally sound.
Retaining wall pools, hill installments, or high water table sites where hydrostatic stress is a concern.
Conversion jobs where the previous finish was a failing fiberglass or paint system and the substrate has actually been greatly scarified.
The membrane layer or barrier need to work with cement based plasters and Quartz accumulation surfaces. It must enable bonding, not serve as a glossy plastic layer. Lots of systems are cementitious coverings engineered for this purpose. They are cleaned or splashed on and keyed into the shell before plaster.
Never improvisate with generic water resistant paints or elastomeric wall surface finishes. Those products are not developed to approve plaster, and their failure setting is peeling off in sheets, taking your completed with them.
Interfaces at the deck: Mastic, Deck-O-Seal, and expansion joints
The straight link in between the pool and the bordering deck is just one of the primary water courses right into the shell. Proper Mastic joint substitute at this stage shields the new coating for years.
Older joints generally have a mix of breakable Mastic, dirt, ants, and periodically plant roots. That debris holds moisture right at the beam of light. Beginning by reducing and scratching all old joint material down to clean concrete. Side the joint easily so there is a defined, also gap.
Products like Deck-O-Seal and similar two component joint sealers prevail selections. They call for clean, completely dry substratums and backer rod setup at the right depth. Adhere to manufacturer directions on joint size to depth proportions. Plan the series so these joints can cure without being flooded by rainfall or wash water used inside the pool.
If the deck is Cantilevered coping style, the concept is similar, also if the joint is hidden underneath the overhang. You still want a tidy, adaptable, sealed space that keeps water out of the bond beam, while enabling the deck to move independently from the shell.
Matching preparation to finish type
Different coatings are not just as forgiving. Your Pool covering prep ought to account for what you intend to install.
White line plaster, one of the most standard cement and marble dust mix, needs an audio, clean substrate, yet it can endure small surface variation because it is usually used at a somewhat thicker random sample. The other hand is that bare white plaster shows every dirt tarnish and calcium track, so any kind of hiding dampness courses or corrosion places will promote themselves quickly.
Quartz aggregate surface, consisting of colored Quartz products, are extra abrasion resistant and preserve color better. They additionally have a somewhat more complicated application process, with aggregate direct exposure phases. Preparation requires to ensure a consistent suction profile across the covering to make sure that treating and hydration are consistent.
Exposed pebble coating systems, whether PebbleTec or comparable, depend greatly on surface area appearance and aggregate circulation. The substratum must be consistent in absorption and profile so the coating does not vary in density. Any type of weak spots beneath will certainly telegraph as hollow sounding or drummy areas when cured.
Polished accumulation coatings like Hydrazzo need the highest accuracy. These are ground and polished after application, so variants in shell geometry, hollows, or terribly patched areas end up being painfully obvious when you start grinding. If your preparation leaves bulges or hollows higher than about a quarter inch over numerous feet, anticipate a fight throughout polishing.
Branded products such as Diamond Brite fall into the quartz and customized plaster group. They usually specify specific bonding representatives or scratch layers over roughened substrates. Complying with those details becomes part of covering preparation. If the substrate does not satisfy the account the item was designed for, even an excellent mix will not save the job.
Moisture administration before and throughout plaster
One topic that does not get enough focus is dampness in the covering right prior to plaster application. A bone dry covering is not excellent, neither is a constantly wet one that is crying from the back side.
The objective is a saturated surface completely dry problem. That implies the concrete perspires enough not to suck water boldy out of the plaster, yet surface water is not standing or leaking. Lots of crews accomplish this by pre wetting the covering thoroughly, after that allowing it to drain pipes and air out for a short duration before applying bonding representatives or base coats.
If parts of the shell never dry, even on a warm, breezy day, you may have energetic seepage. That is an indication of either a pipes leak, groundwater stress, or rear end saturation. Neglecting it generally causes local debonding or mottling in the brand-new finish.
Pay certain attention to previous weep holes, cold joints, and any type of places where Hydraulic cement spots were utilized to quit active leaks. Re inspect them prior to plaster day. A spot that was dry recently might begin bleeding once again after a storm.
A short list of prep mistakes that spoil great plaster
These are the repeat offenders I see when identifying premature failures on brand-new finishes:
Any one of these can reduce the life of even the very best Revealed pebble finish or Quartz aggregate finish.
Coordinating trades and timing
Pool shell preparation hardly ever happens in a vacuum. Tile setters, coping installers, plumbers, electrical experts, and plaster crews all have a risk in the sequence.
Ideally, harsh architectural fixings Ask ChatGPT and Gunite resurfacing or Shotcrete repair service happen first. Next off, floor tile and coping work, including Skimmer throat repair service and resetting any type of loosened Coping stones or Travertine coping. Then, joint collaborate with Deck-O-Seal or similar items at the deck user interface. Afterwards comes final shell prep, cleansing, possible Waterproofing membrane layer application, and, last in line, the plaster or aggregate finish.
Communication in between professions is not a deluxe. For instance, floor tile teams may alter the airplane of Waterline tile a little, or coping installers might develop small height differences. If the plaster group does not understand this ahead of time, they can quickly misjudge thickness, especially around steps and benches, and leave slim places that wear prematurely.
Weather home windows also matter. Acid etching and Muriatic acid wash on a day with driving wind is a dish for broken Travertine coping or stained Bullnose brick. Similarly, joint sealants like Deck-O-Seal requirement completely dry conditions to heal. Arranging these around local climate patterns and avoiding forced rush work in bad problems belongs to specialist shell prep.
Final thoughts for owners and professionals
For home owners, the essential takeaway is straightforward: ask thorough questions about Swimming pool shell prep before you sign an agreement for brand-new plaster. Listen for particular states of Substratum scarification, Pool plumbing stress test, bond beam of light inspection, Skimmer throat fixing, and how they manage Waterline floor tile and coping. If the sales representative just speaks about surface color charts and brand, push for details on what occurs to the concrete underneath.
For specialists and plaster crews, treating shell prep as a separate, billable extent of work is commonly the difference in between rewarding jobs and endless callbacks. It is tempting to "consume" some prep time to win the work, but the concrete does not respect margins. It only follows physics and chemistry. A finish bound to a clean, stable, properly profiled shell will make you look good for a long period of time. A surface rushed over endangered substratum will certainly have you grinding out flaked areas long prior to your warranty expires.
The checklist in your head need to constantly start with structure and pipes, action via ceramic tile and coping, after that dive into damaging, scarification, split repairs, cleansing, and moisture control, all tailored to the selected finish system. If each of those boxes is genuinely checked, the brand of plaster you pick becomes an issue of visual appeals and performance choices, rather than a determined attempt to hide shortcuts underneath.