Affordable Garbage Disposal Repair Houston: Before You Replace
A stubborn hum, a sink that fills instead of drains, that faint electrical smell that makes you wonder if you should pull the plug. In Houston, I see the same handful of garbage disposal problems repeat across neighborhoods from Spring Branch to Pearland, usually with the same moment of dread: is it time to replace it? Often, no. With the right diagnosis and a little mechanical empathy, an affordable garbage disposal repair saves money, time, and a Saturday spent at the home center comparing boxes.
The trick is knowing where the line falls between a straightforward fix and a unit that has aged out. Disposals aren’t complicated machines, but they live hard lives. They chop, grind, and shrug off heat and grease until a mistake or a slow decline pushes them over the edge. If you understand how they fail, you can make a smart call and avoid paying for work you don’t need.
What’s inside that humming can under your sink
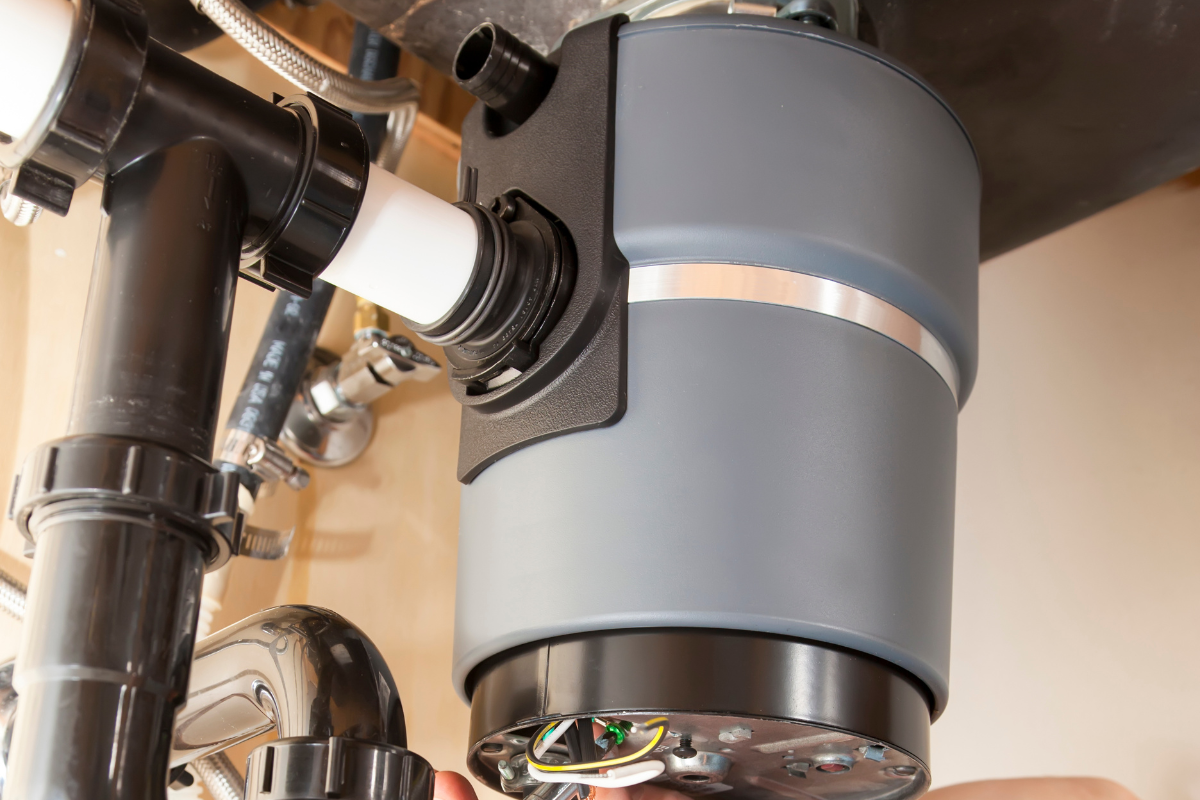
A typical disposal has a compact electric motor, a flywheel with two free-swinging impellers, a stationary shredder ring, and a chamber that pushes ground waste toward the drain. It isn’t a blender with blades, and it doesn’t really “shred” bones the way advertisements suggest. It flings food scraps against the ring until they are small enough to pass into the wastewater stream. A rubber splash guard keeps bits from returning skyward. The motor connects through a sealed bearing to the grinding plate, and a reset button and overload protector sit at the bottom of the housing. That’s almost everything there is to it.
When something goes wrong, it’s usually because something got stuck, something burned out, or something wore out. Each path points to a different repair.
The most common symptoms and what they really mean
A disposal that doesn’t turn on at all usually has an electrical interruption, not a mechanical failure. I’ve crawled under hundreds of sinks where the unit was fine, the outlet was dead. Houston kitchens often have disposals tied to a switch that controls a half-hot outlet. If a dishwasher installer or a DIY backsplash project moved wires around, the switch might be bypassed or the load tied to the wrong leg. If the unit suddenly went quiet after a hard stall, the internal overload likely tripped. That’s a built-in safety that protects the motor windings when it locks up.
A disposal that hums but doesn’t spin has a jam. Often it’s a pit, a piece of silverware, or a fragment of bone lodged between the impeller and the shredder ring. That humming is the motor trying to turn against a locked plate. Run it like that and you’ll overheat the windings and cook the unit, but catch it early and it’s a five-minute fix.
Grinding that sounds like gravel means debris is trapped. Screeching or a grinding plate wobble suggests bearing failure or a bent plate, which is rare unless the unit ingested something it shouldn’t have. Water leaking from the top flange points to a sink gasket issue. Leaking from the side near the dishwasher inlet usually follows a recent installation where the knockout plug was removed but the clamp was left loose. Leaking from the bottom, out of the housing, almost always means a failed internal seal. That last one matters because an internal leak affects the motor and isn’t something you should ignore.
Slow drainage, especially in older homes where cast iron meets PVC under a kitchen sink, usually isn’t the disposal’s fault. It’s a drain problem downstream. Swap the disposal and the symptom stays, which is an expensive way to learn the real issue lies in the trap or the line.
Repair or replace: the boundary that saves you money
If a unit is less than five years old, rated at least 1/2 HP, and hasn’t lived through chronic abuse, I lean toward repair as long as the problem falls into the categories of jam, electrical interruption, gasket leak at the flange, or dishwasher inlet hose issue. Those fixes are fast, inexpensive, and restore full function.
Units more than eight to ten years old, especially budget disposals in the 1/3 HP range, are often past their prime if they have chronic clogs, frequent resets, or internal leaks. They can be repaired, but you end up chasing problems. In that window, replacement is the better spend.
Houston’s water chemistry and heat have a subtle effect here. High usage, hot water, and grease-heavy cooking do more damage than hard water alone. I see 1/2 HP units that last eight to ten years when treated kindly, and only three to five when the sink doubles as a trash chute. A mid-tier 3/4 HP unit with stainless components often stretches to a decade or more with fewer complaints about vibration and noise.
Quick fixes a homeowner can try safely before calling for help
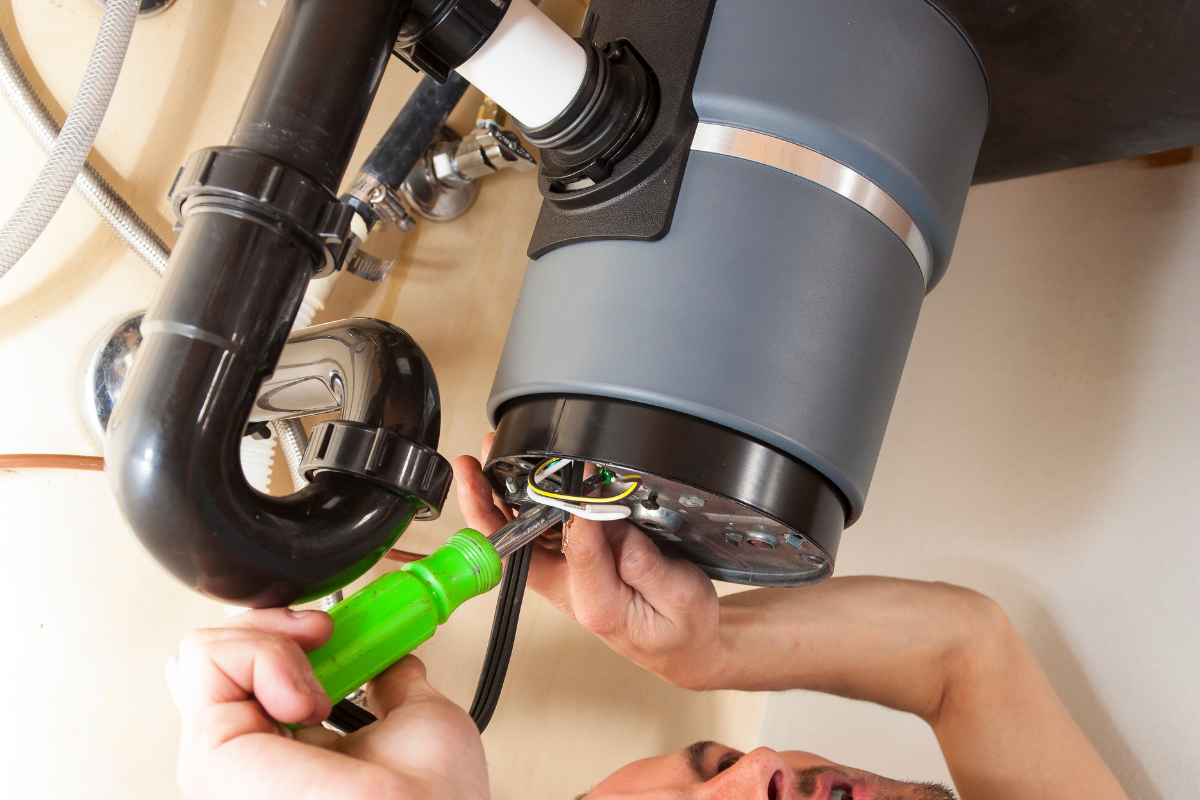
Safety first. Unplug the unit or switch off the circuit, then confirm the outlet is dead. Use a flashlight, not fingers, to inspect the chamber. Keep tools within reach. With that out of the way, some practical steps can make the difference between a service call and a satisfied nod.
- Reset and unjam checklist: 1) Hit the red reset button on the bottom of the unit. If it clicks, the overload tripped. Restore power and test briefly. 2) If it hums but does not spin, cut power and insert a hex key (usually 1/4 inch) into the bottom center socket. Work the flywheel back and forth until it loosens. Some units have an external wrench port; others accept a supplied wrench. No hex port? Use a wooden dowel from above to gently move the plate left and right. 3) Remove visible obstructions with pliers or tongs, never your hand. Coins and fruit pits are common culprits. 4) Restore power, run cold water, then pulse the switch. If it starts, let it run with water for 30 seconds to clear residue.
That short routine resolves most jams and overheat lockouts. If the unit trips again immediately after starting, suspect either a persistent obstruction or a failing capacitor within the motor housing, which is not a homeowner repair on most models.
If you see water pooling on the cabinet floor, note the leak source. If it’s from the top where the disposal meets the sink, snug the three mounting screws and inspect the plumber’s putty or gasket at the flange. If it’s dripping from the rubber dishwasher hose connection, tighten the clamp. Any water coming out of the bottom disposal not working humming shell points to internal seals, and that’s replacement territory unless the unit is new and under warranty.
Odor control is simple but often overlooked. Citrus peels and ice chips get the attention, but the real work is done by degreasing and flushing. A small amount of dish soap with hot water, run for a full minute after grinding, clears film. Bleach is a last resort, used sparingly, and never with other cleaners. If the splash guard is removable, take it out and scrub both sides. That flexy rubber ring collects the worst of the smell.
When repair is the smart call
I carry a consistent set of parts when dispatched for affordable garbage disposal repair around Houston. A new sink flange gasket, a dishwasher inlet clamp, a p-trap kit, wire nuts, strain reliefs, and a handful of hex wrenches can rescue most jobs without a new unit. Time and again, a rattling unit turns into a 30-minute visit with a bill that makes sense.
If the problem is electrical, it may be as simple as replacing a worn switch or correcting an outlet wired to the line instead of the load side on a GFCI. In older homes, the disposal shares a circuit with the dishwasher. If both die, trace the power back to the panel and the nearest GFCI. I see kitchen rewires where the GFCI protects downstream outlets behind the fridge or in the garage. A reset there brings the disposal back to life with no parts replaced.
Let’s talk cost in real terms. A serviceable jam or reset visit commonly lands in the $100 to $175 range in the Houston market depending on travel and company policy. Replacing a top flange or correcting a dishwasher inlet leak runs in the same zone, maybe another $20 to $40 in materials. Compare that to a new mid-grade disposal and installation, which often lands between $275 and $500, more if new wiring or a rework of the trap is required. If you can solve the issue with a modest repair, it’s the obvious choice.
Where replacement earns its keep
Once a unit leaks from the motor housing or shaft seal, I advise replacement. It’s not only the cost of disassembly and seal kits, it’s the reality that water inside the motor shortens its life. A homeowner might buy a seal kit online, but labor eats the savings and the motor may already be compromised.
Noise and vibration also matter. The older 1/3 HP disposals that came with many starter homes in the 2000s run loud and rattle as bearings wear. A move to a balanced, insulated 3/4 HP unit with stainless grinding components is a quality-of-life upgrade. If you cook often, grind fibrous vegetables, or run the dishwasher daily, the jump is noticeable. Your neighbors won’t appreciate it, but your family will.
If your kitchen layout changes or you add a farmhouse sink with a thicker apron, the existing mounting flange might not fit well. That is an opportunity to update. Some modern units include a more robust anti-vibration mount and quick-lock rings that make future service simpler.
Lastly, persistent clogs that trace to the junction between the disposal outlet and the house drain can be a design flaw. If the disposal’s outlet sits too high relative to the P-trap, or the horizontal run holds water, you will fight slow drainage. Sometimes a replacement with a unit that has a lower outlet, combined with a reconfigured trap, solves clogs you have lived with for years.
Choosing a new disposal in Houston so you only buy it once
If the diagnosis points to replacement, make the right choice up front. There’s nothing glamorous about a disposal, but the right pick makes daily life smoother. Power matters, but so does build quality and fit.
In a Houston kitchen that sees real cooking, 3/4 HP hits the sweet spot. It handles peels, moderate bones, and small loads without frequent stalls. Stainless steel components resist corrosion in the humid Gulf climate and hold up to cleaning cycles. Look for a continuous feed unit with good sound insulation if you have an open floorplan. Batch feed units with a stopper-style switch offer safety in households with adventurous toddlers, though they cost more.
Measure your under-sink space and check the outlet height. Some sinks, especially deep bowls, leave less room for a tall motor. Verify that your dishwasher drain hose will route with a proper high loop or air gap. If you plan on Garbage disposal installation Houston professionals can evaluate that in minutes, often at no cost when you schedule the install.
Brand choice is a topic with plenty of opinions. In my experience, availability of parts and service matters more than brand loyalty. Models with a standard three-bolt mount make future swaps faster. Warranties vary from one year to ten; read the fine print on in-home service versus parts only. A longer warranty can hint at better components, but look at reviews for vibration and noise over time. The quietest units usually include a heavier shell and a finer balance on the grinding plate.
Why local experience changes the outcome
Houston homes are not all the same. In West U, older bungalows sometimes have galvanized remnants and quirky traps that fight flow. In newer builds across Katy and Cypress, I find plastic traps that settle and leak at slip joints. Water heaters set too high push 140-degree water into the disposal, which softens plastic fittings and wears rubber faster. The best kitchen disposal repair Houston technicians consider those variables instead of treating every house like a showroom install.
Then there is the wildlife of the kitchen: cutlery that finds its way into the chamber, peach pits at the height of summer, crawfish shells after backyard boils. After a crawfish season, I see a spike in jammed or clogged disposals because shells stick in the ring and push into the trap. The fix is simple if you catch it fast, but if left, grease binds the fragments and creates a stubborn plug.
One caution after heavy cooking: give the unit a long flush. Run cold water while grinding, then keep water flowing for 30 to 60 seconds. That habit alone prevents half the callbacks I see for “just stopped draining.”
The real cost of waiting too long
A failed disposal doesn’t just annoy you. It can cause damage. A slow leak saturates cabinet floors and wicks into particleboard frames, which swells and crumbles. You may not notice until a hinge loosens or a shelf sags. Drips can track along the power cord toward the outlet and trip a GFCI for reasons that seem mysterious, until you find the wet cord. Catching a leak early can be the difference between an affordable garbage disposal repair and new base cabinets.
Persistent jams also stress the motor. Repeated resets mask the problem for a while, but each stall heats the windings and shortens life. If you hit the reset more than a couple times a month, you’re not fixing a symptom, you’re ignoring a cause. That cause might be as simple as a worn splash guard letting more debris fall back, or as involved as a misaligned mounting ring that lets the grinding plate wobble.
What a professional repair visit should look like
When a tech shows up, you want a systematic approach, not guesswork. A good visit starts with a quick functional test, then power off, then a look at the mount, wiring, and drain alignment. The tech should check the hex socket for free movement, remove the splash guard to inspect the ring, and snake or clear the trap if slow drainage persists. If the unit is older, they should check for play in the shaft, listen for bearing noise, and test for leaks under pressure with the sink filled.
Quotes should separate labor and parts, and if replacement is recommended, you should hear why in concrete terms: internal leak, shaft play, winding failure, or incompatible geometry with the existing trap. If you’re offered Garbage disposal repair as the first option when appropriate, that’s a good sign. If the conversation jumps straight to replacement with no diagnostics, ask questions.
Do disposals really handle everything the ads show?
No. Fibrous materials like celery, corn husks, leek tops, and onion skins wrap around impellers and act like a parking brake. Coffee grounds turn into a dense sludge and settle in traps. Pasta and rice swell and form paste. Eggshells are neutral, but the membrane inside resists grinding and can tangle. Small fish bones are usually fine in moderation. Large bones are a poor idea. Fats and oils should never head down the drain regardless of disposal model; they cool and congeal downstream where they are hard to reach.
The better rule is modest loads, cold water running, and patience. Feed scraps gradually rather than stuffing a whole bowl into the chamber. If you grind citrus, do it for scent, not as a fix. The peel oils help, but they don’t solve a fundamental grease buildup.
A note on noise, vibration, and the feel of quality
Power ratings tell part of the story, but how a unit feels and sounds matters in daily use. Cheaper units vibrate more because the grinding plate balance is loose and the housing lacks insulation. Over time, that vibration loosens slip joints and can even back off mounting screws. A unit that starts smoothly, runs with a lower pitch, and doesn’t rattle the sink will protect the rest of the plumbing.
Rubber isolation mounts, heavier shells, and better bearings cost more up front. They save headaches, especially in homes with quartz or granite tops where resonance amplifies sound. I’ve replaced dozens of noisy budget disposals in townhomes where the sound telegraphed into shared walls. The fix was a better unit, not a repair.
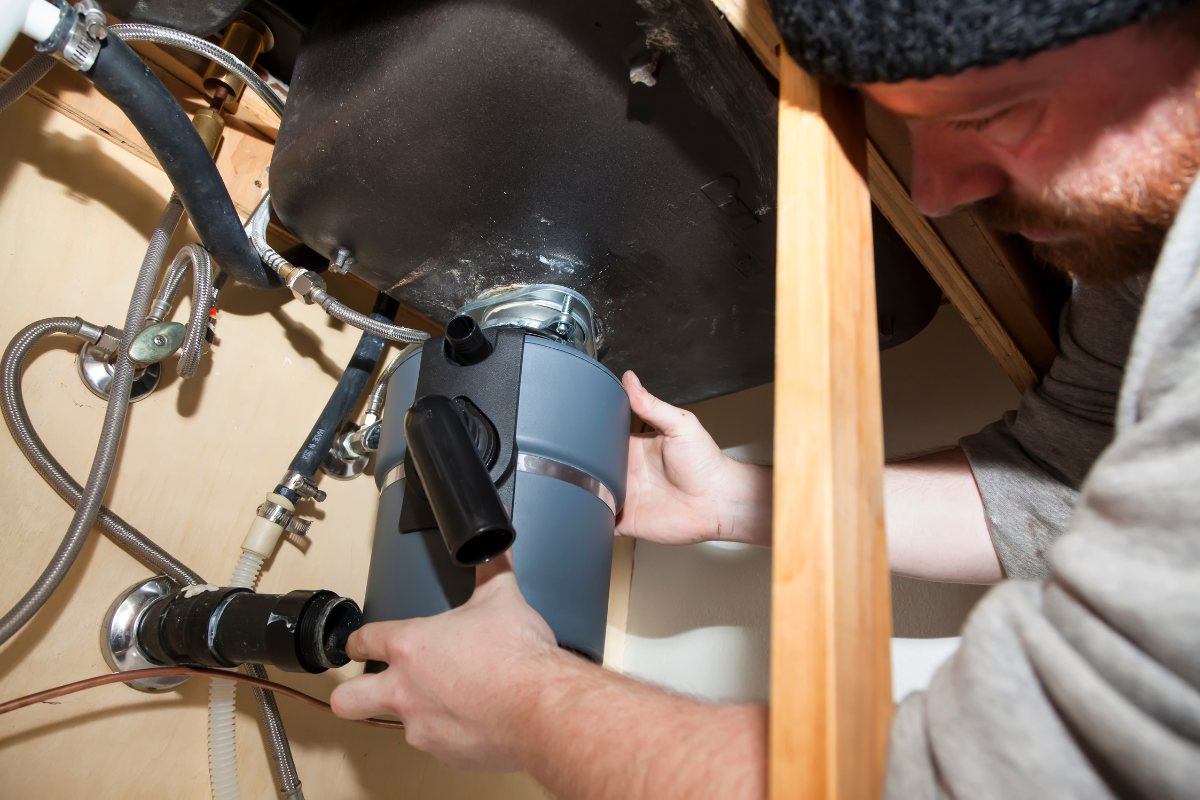
The right way to install for fewer problems later
If you decide on a new unit, ask for proper alignment of the outlet to the trap and a high loop on the dishwasher hose. Use fresh plumber’s putty or the correct gasket for the sink material. Stainless sinks often prefer putty, composite and granite sometimes require a rubber gasket to avoid staining oils from putty. Torque the mounting ring evenly to keep the flange flat. Use a strain relief on the cord, or hardwire through an electrical whip with a covered junction box if the circuit is dedicated and local code allows.
For those comfortable with DIY, shut off power at the breaker, photograph the existing setup, and support the unit while releasing the mount. If you’re swapping like for like, it can be a single afternoon job. If anything looks off in the drain or wiring, or if you are upgrading horsepower and size, it may be smart to call a pro who handles garbage disposal installation Houston wide. A clean install pays you back every time you turn the switch.
Preventive habits that actually work
Grease is the silent killer. Wipe pans with a paper towel before washing. Keep a small container for used oil and solidify it before tossing. Run cold water while grinding, then a short flush afterward. Hot water melts grease in the chamber but pushes it farther down where it cools and coats pipes. Cold water keeps fats congealed long enough to move to the main sewer line where volume and velocity dilute it.
Replace the splash guard if it’s cracked or humming garbage disposal loose. It’s a cheap part that reduces backflow and keeps debris from riding up and getting flung back into the sink. Once or twice a year, turn off power, remove the guard, and scrub the upper chamber and the guard itself. A toothbrush and dish soap work better than any gimmick.
If you travel or won’t use the disposal for a stretch, run it with water for thirty seconds before you go and when you return. That keeps seals wet and prevents odors. Little things like this add years to a unit’s life.
How “affordable” stays affordable
Affordable garbage disposal repair isn’t just about the lowest invoice. It’s about avoiding repeat calls. The cheapest fix that ignores a misaligned trap or a leaky flange sets you up for another bill. The work should address the cause. If you are closing on a home and the inspection mentions a disposal issue, bring a tech for a focused look. Resolving it before move-in avoids cleaning under a sink full of moving boxes and cookware.
Look for transparency. In Houston, most reputable outfits offer flat-rate pricing for common disposal repairs and clear quotes for replacements. If the diagnosis lands in a grey area, ask the tech to show you the play in the shaft or the evidence of internal leaks. A quick video on your phone during the visit becomes a handy benchmark if problems resurface.
If your home needs more than a disposal fix, such as a P-trap relocation or updated electrical outlets near a sink, bundle the work. You’ll pay one trip fee and reduce coordination headaches, which keeps costs down overall.
When a repair becomes an upgrade
Sometimes a failure is a chance to improve daily life. If your kitchen is a main hub of activity, consider a disposal with added sound insulation and a baffle design that reduces splash. If you swap to a deeper sink, choose a unit with a lower outlet to keep the trap slope correct. If you plan to add a water filtration system or a hot water dispenser, leave proper space and plan routing now. A thoughtful install avoids the classic under-sink tangle that makes future service miserable.
There’s also the option of an air switch mounted in the countertop or sink deck. It uses a small air tube from a push button to a control box and keeps electrical switches away from splash zones. In Houston remodels, I see these frequently in kitchens with clean backsplash lines where designers prefer fewer wall switches.
Final guidance: a simple decision tree
Use this quick path to decide your next step.
- Decision guide: If the unit is silent, check power, switch, outlet, GFCI, then the reset button. If it hums, power off and free the plate with a hex key, remove debris, and test. If it leaks at the top or the dishwasher inlet, tighten or replace gaskets and clamps. If it leaks from the bottom or shows shaft play, plan for replacement. If it requires frequent resets, jams often, or vibrates excessively, evaluate age and consider upgrading to a better unit.
When the repair is straightforward, do it and move on with your day. When replacement makes sense, choose a unit that fits your kitchen and your habits, not just the cheapest box. For homeowners looking for kitchen disposal repair Houston services that don’t oversell, insist on diagnostics first and recommendations that match what the tech can show you in plain sight.
Most disposals die by neglect or misuse, not mystery. Treat yours well and it will run quietly in the background while you focus on the more interesting parts of cooking and living. And if it falters, a measured approach can keep the fix affordable and the decision clear.
DYZ Plumbing, LLC
Address: 1220 Blalock Rd, Houston, TX 77055
Phone: (832) 877-9600